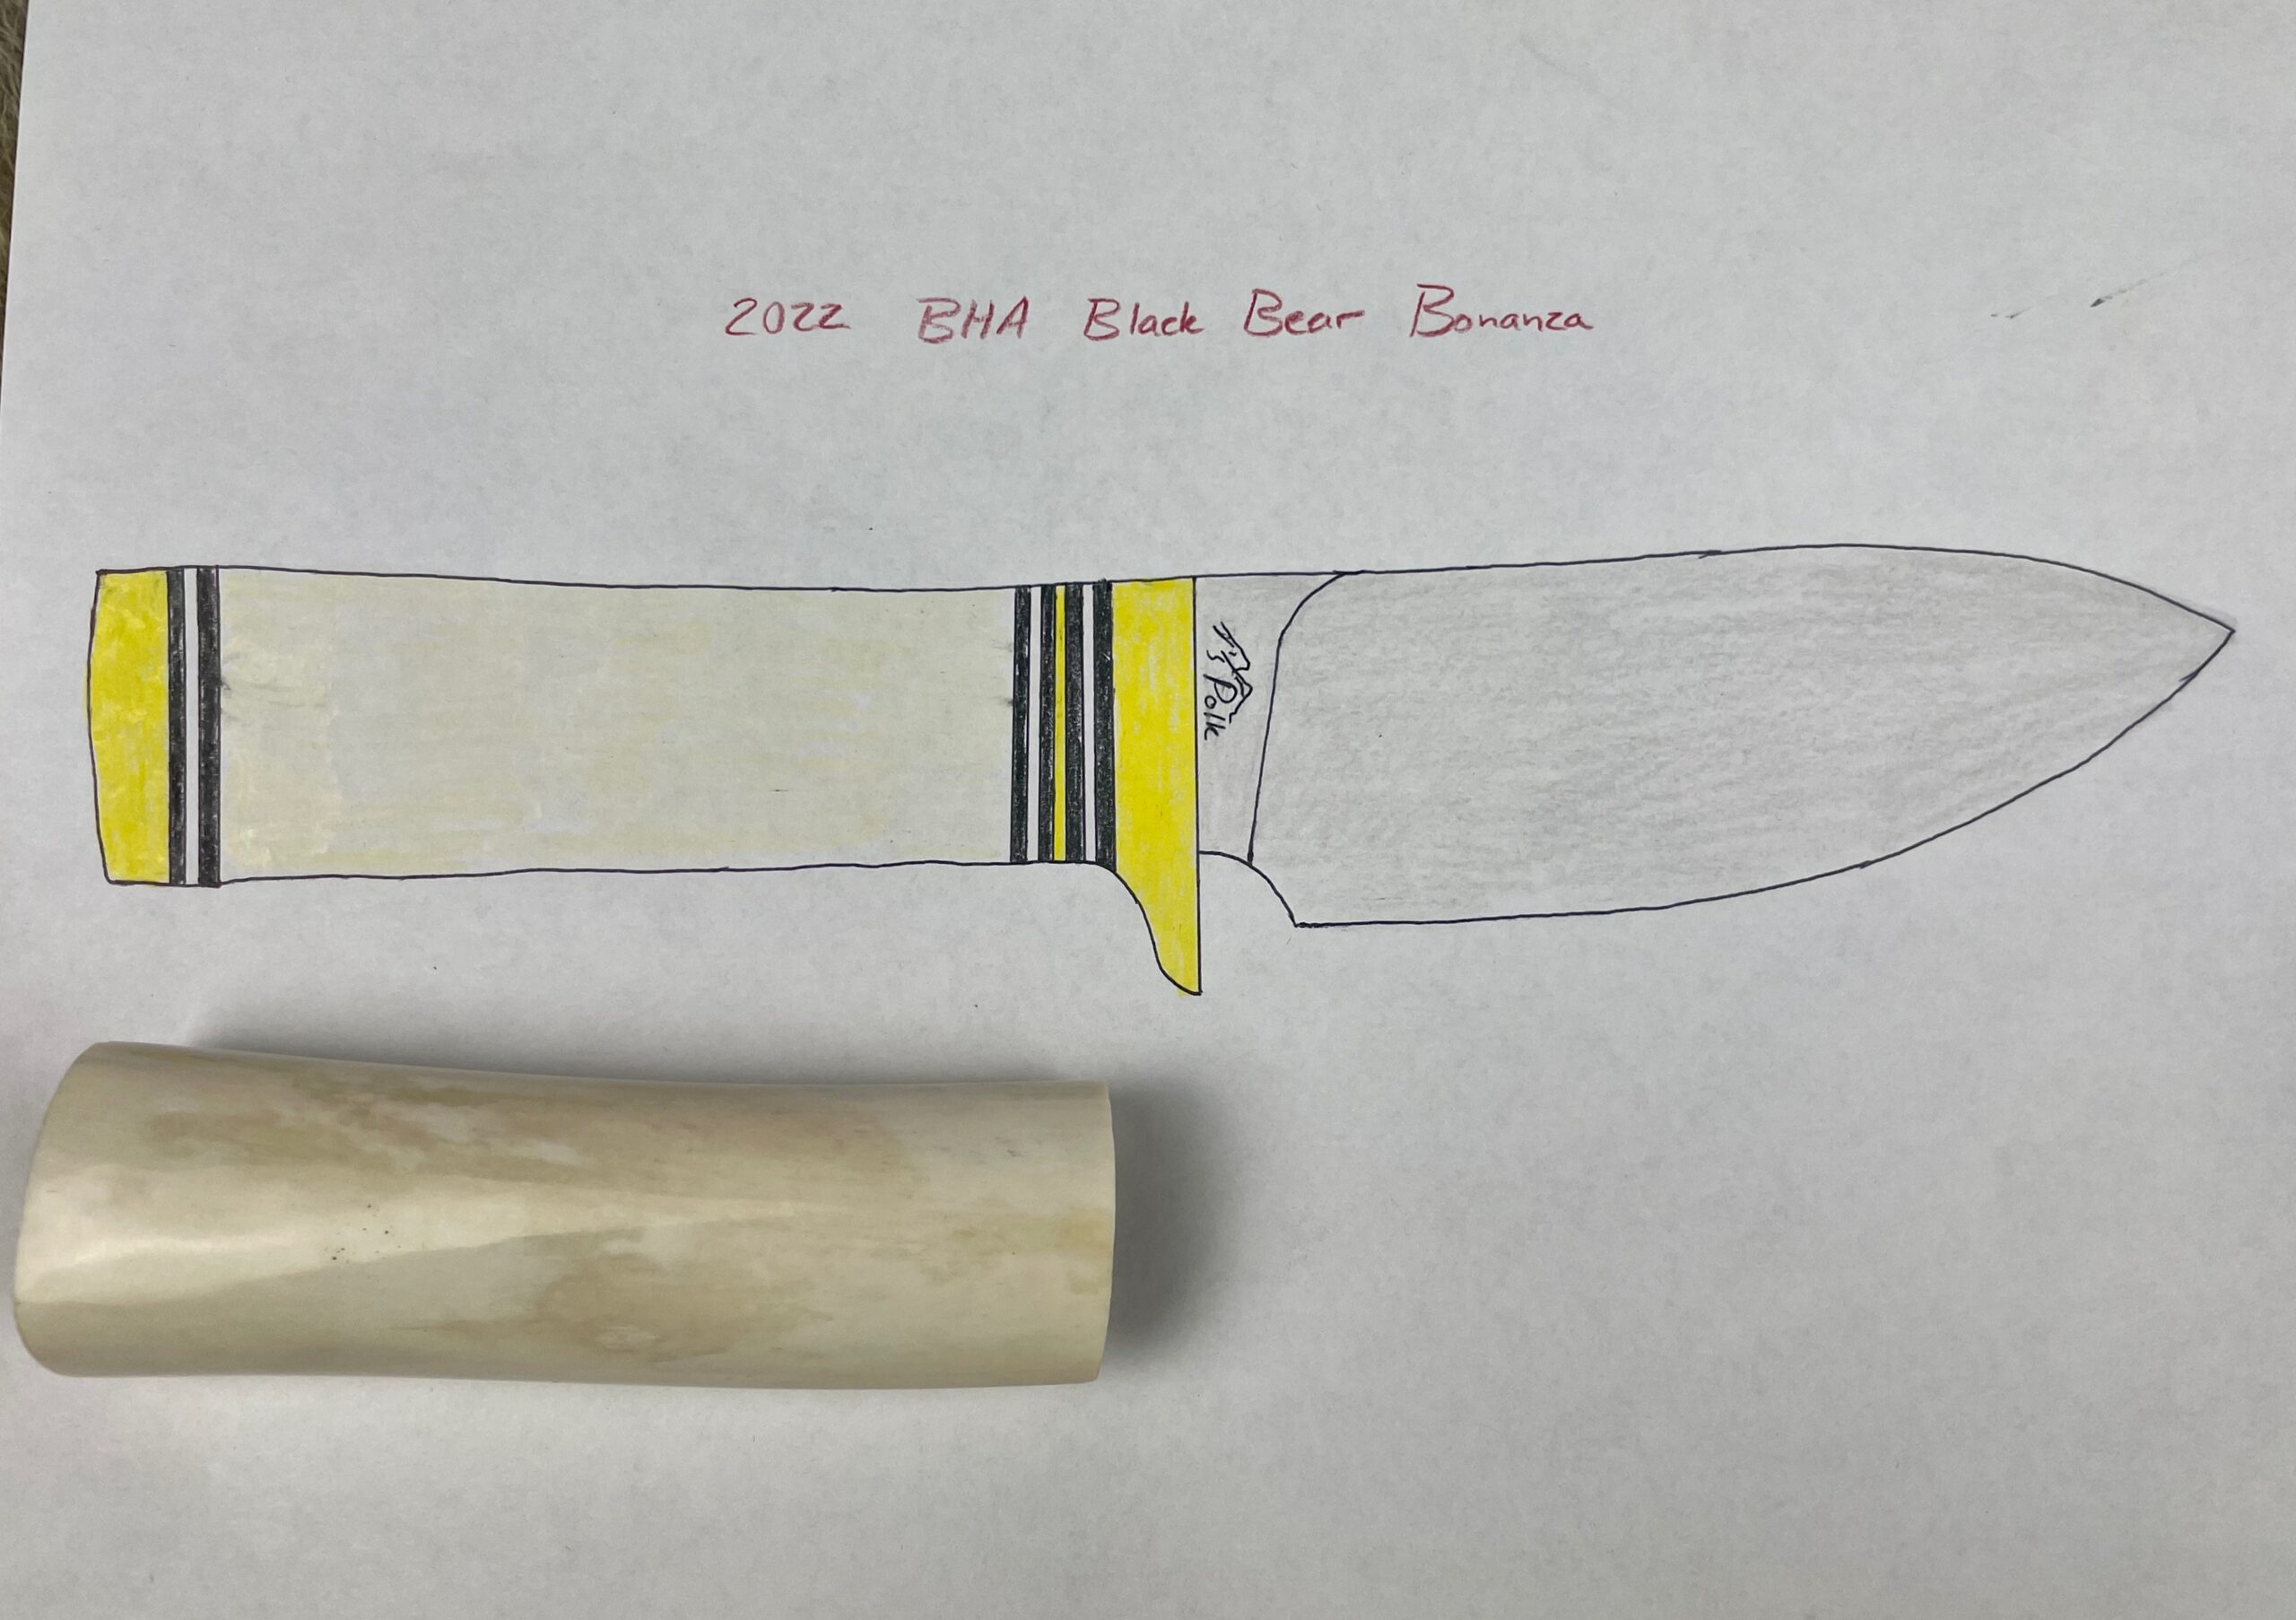
Ivory Bear Knife
This build was created to celebrate conservation. In 2022 at the first annual Black Bear Bonanza we began coordinating on doing a special knife build to honor the conservation efforts and the icon of the North American wilderness, the black bear. Clay Newcomb donated the right femur of the largest black bear that he has ever taken, named Batman. Brad Green trapped beaver on a public land pond in Arkansas, fleshed, and tanned the tail. I created a knife pattern specifically to utilize these materials to be raffled off at the 2023 Black Bear Bonanza.
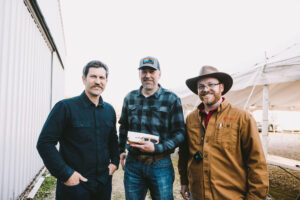
A group photo with Clay Newcomb (left), Michael Huff (center), and Garrett Polk (right). Clay donated the bone in the handle to me, I made the knife, and now it belongs to Michael.
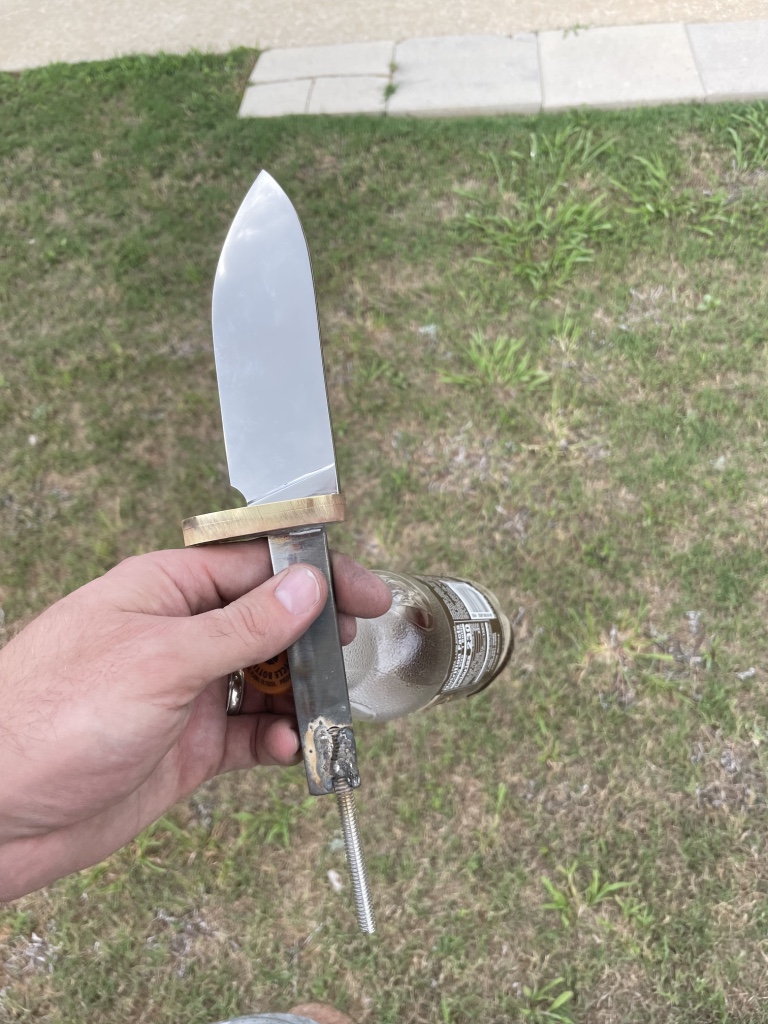
Ivory Bear Knife Finish
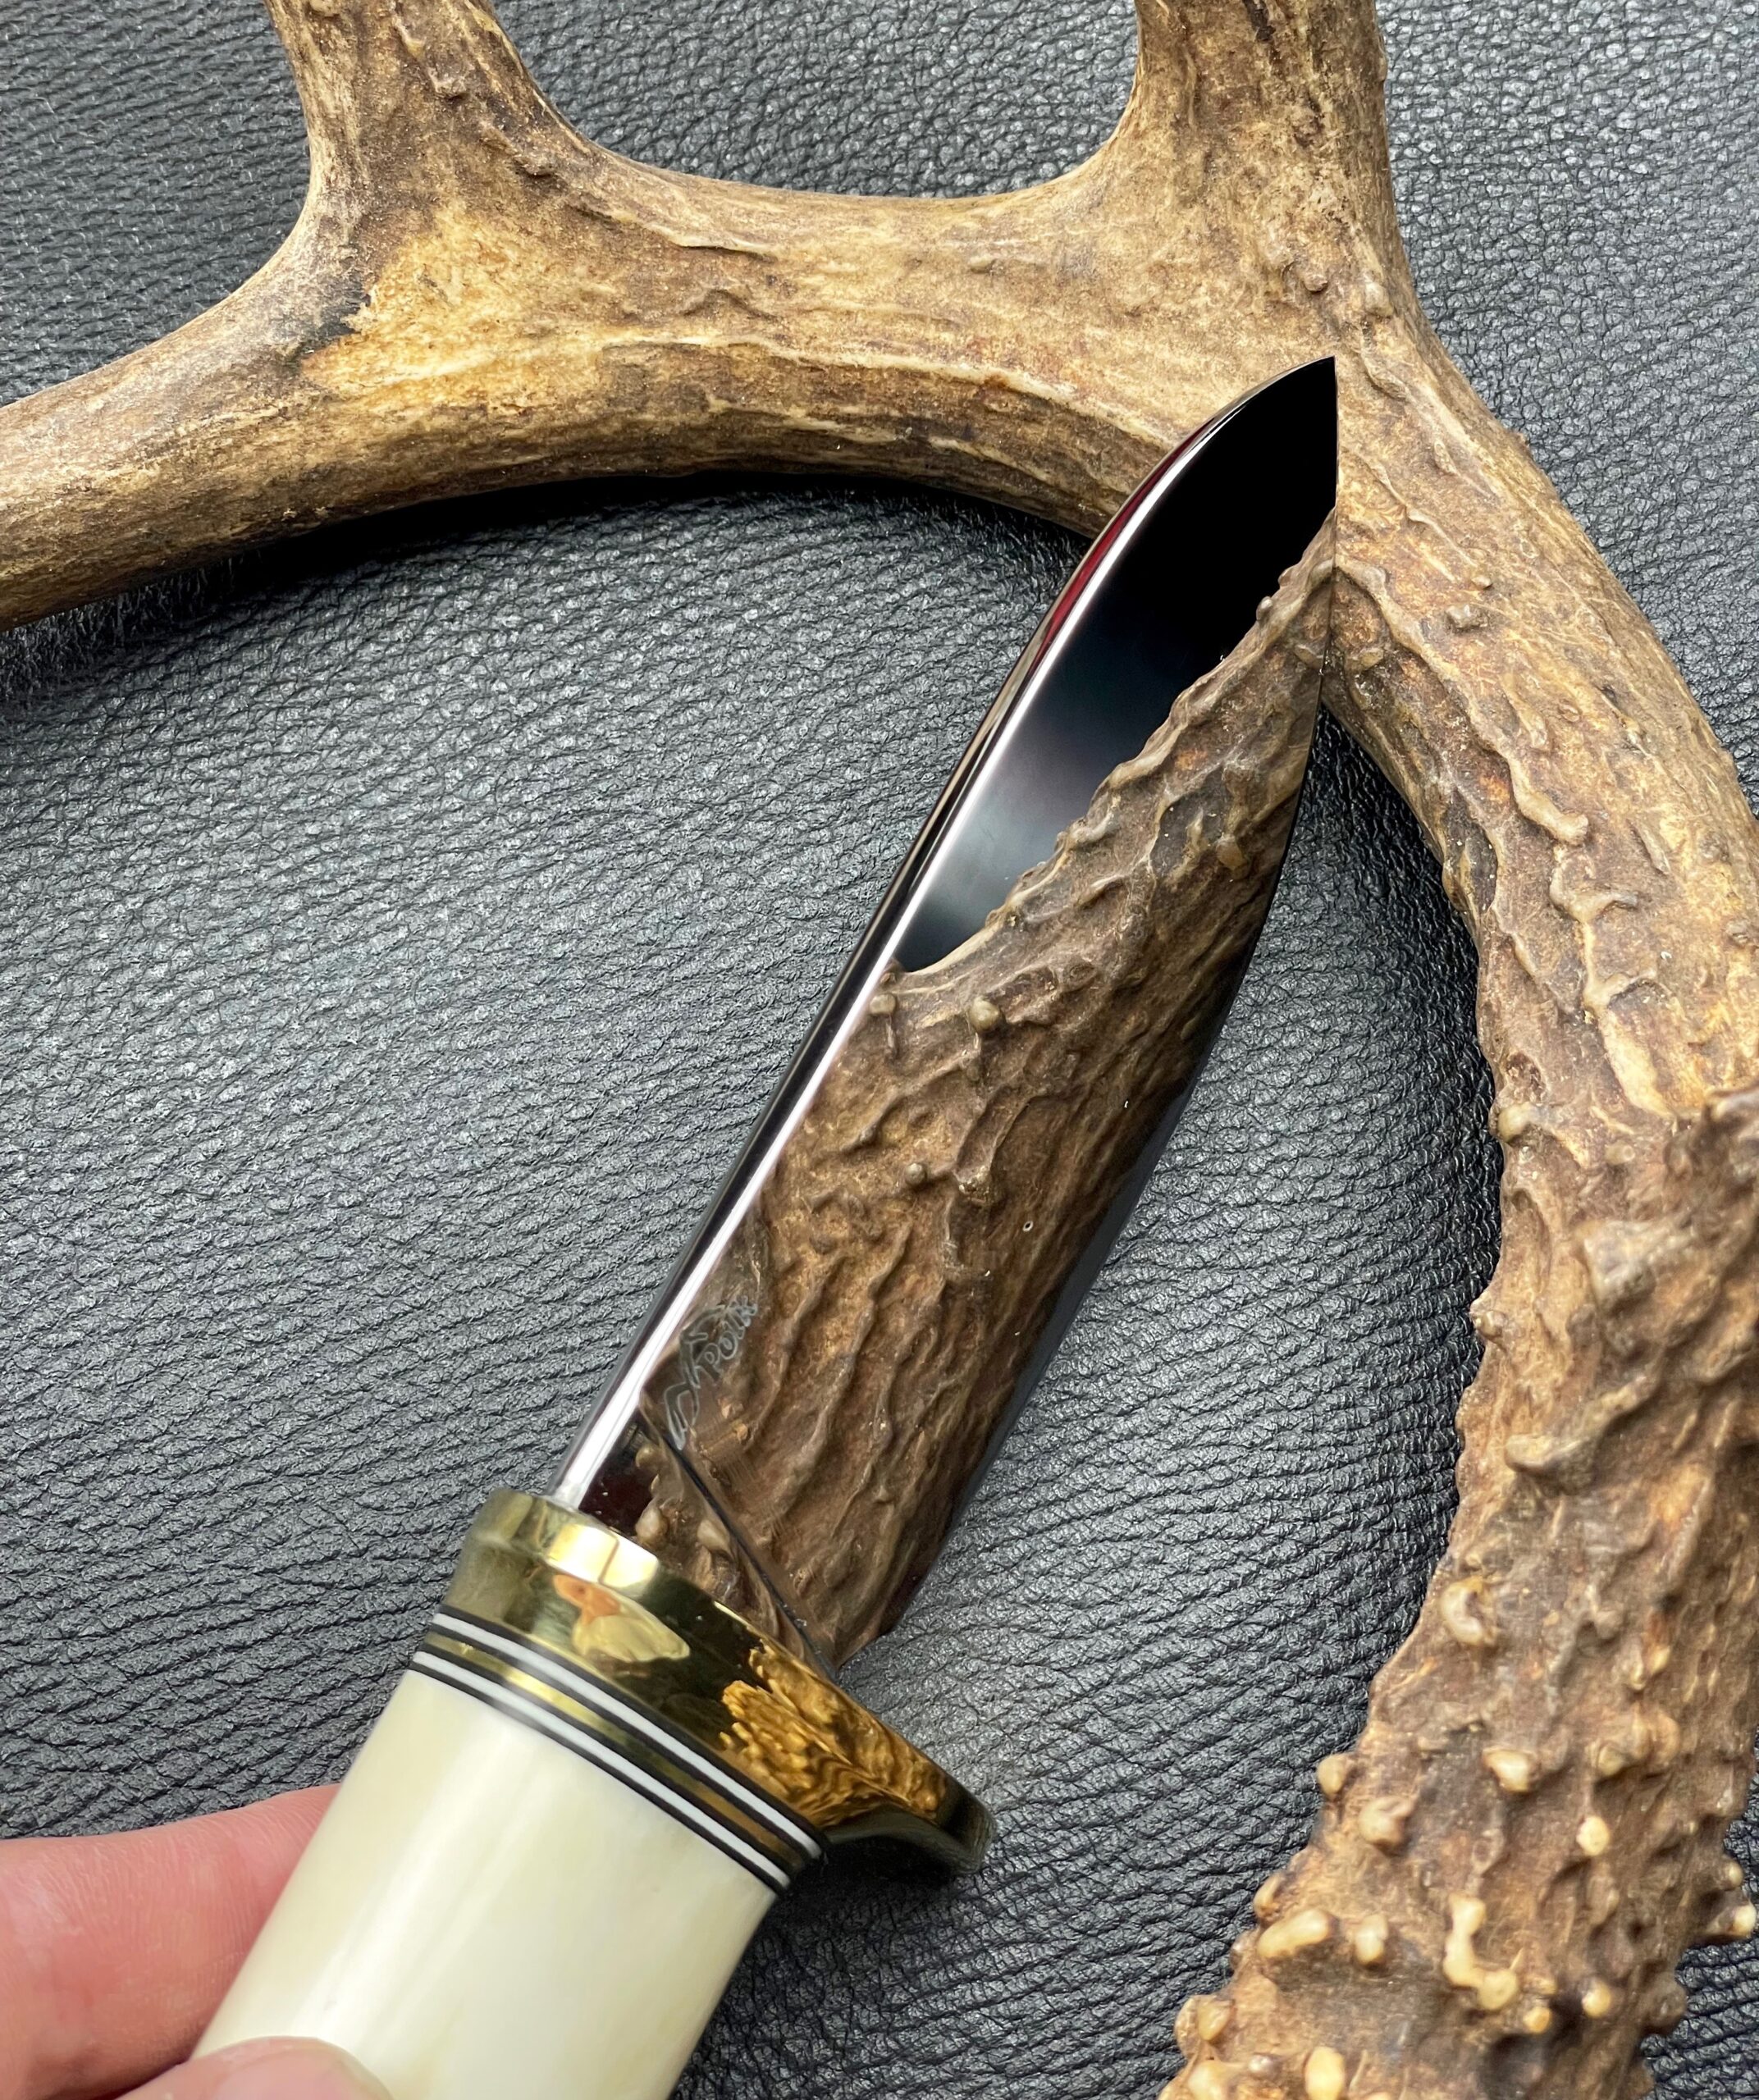
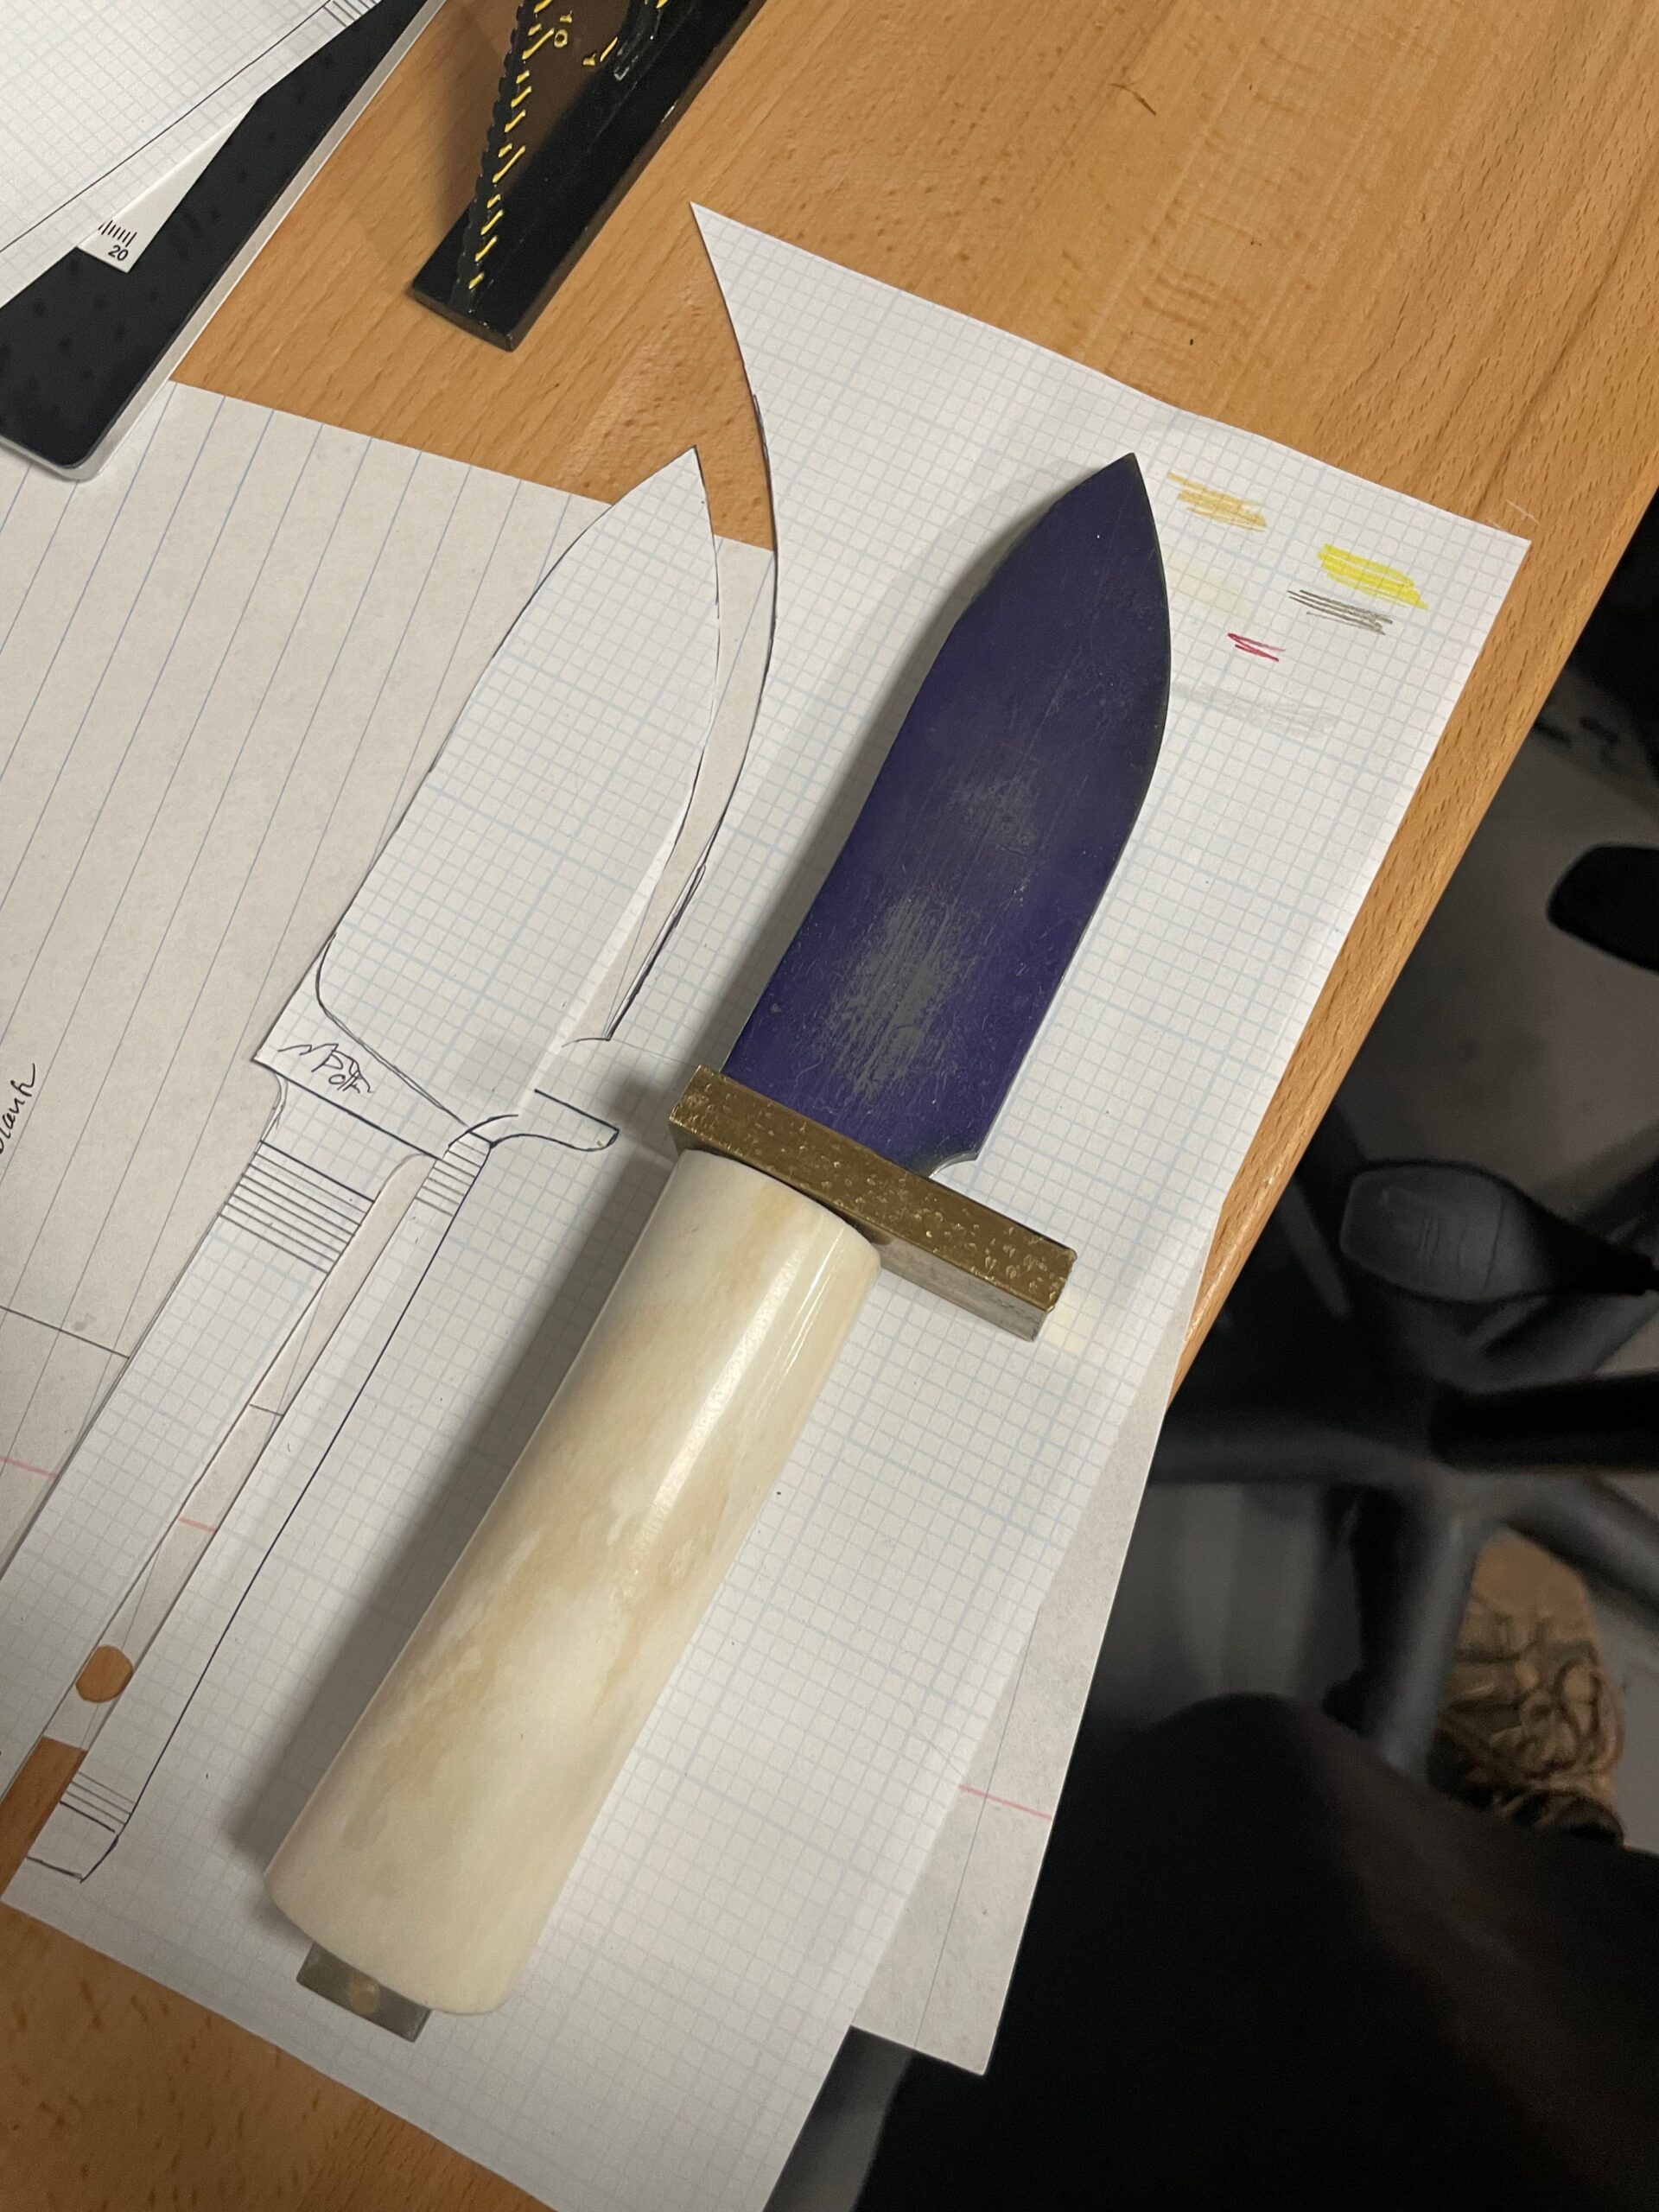
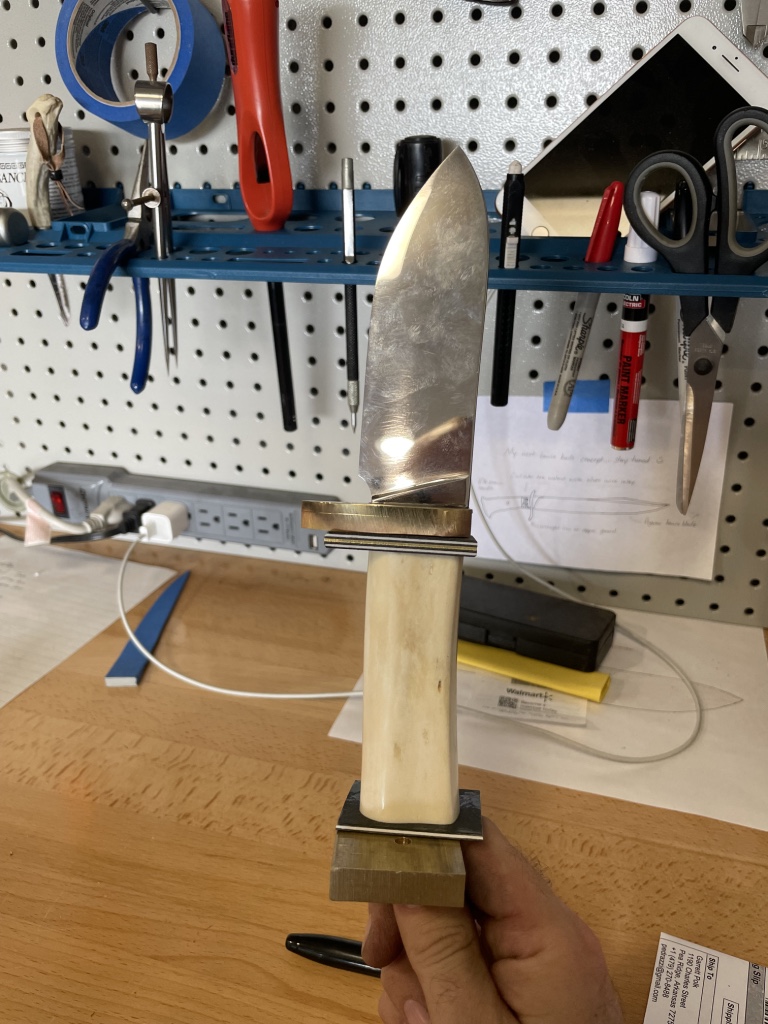
The semi-skinner blade shape is 4.5″ long and 1.5″ tall. It was inspired by the work of George W Sears and sized to be optimal for breaking down bear sized animals.
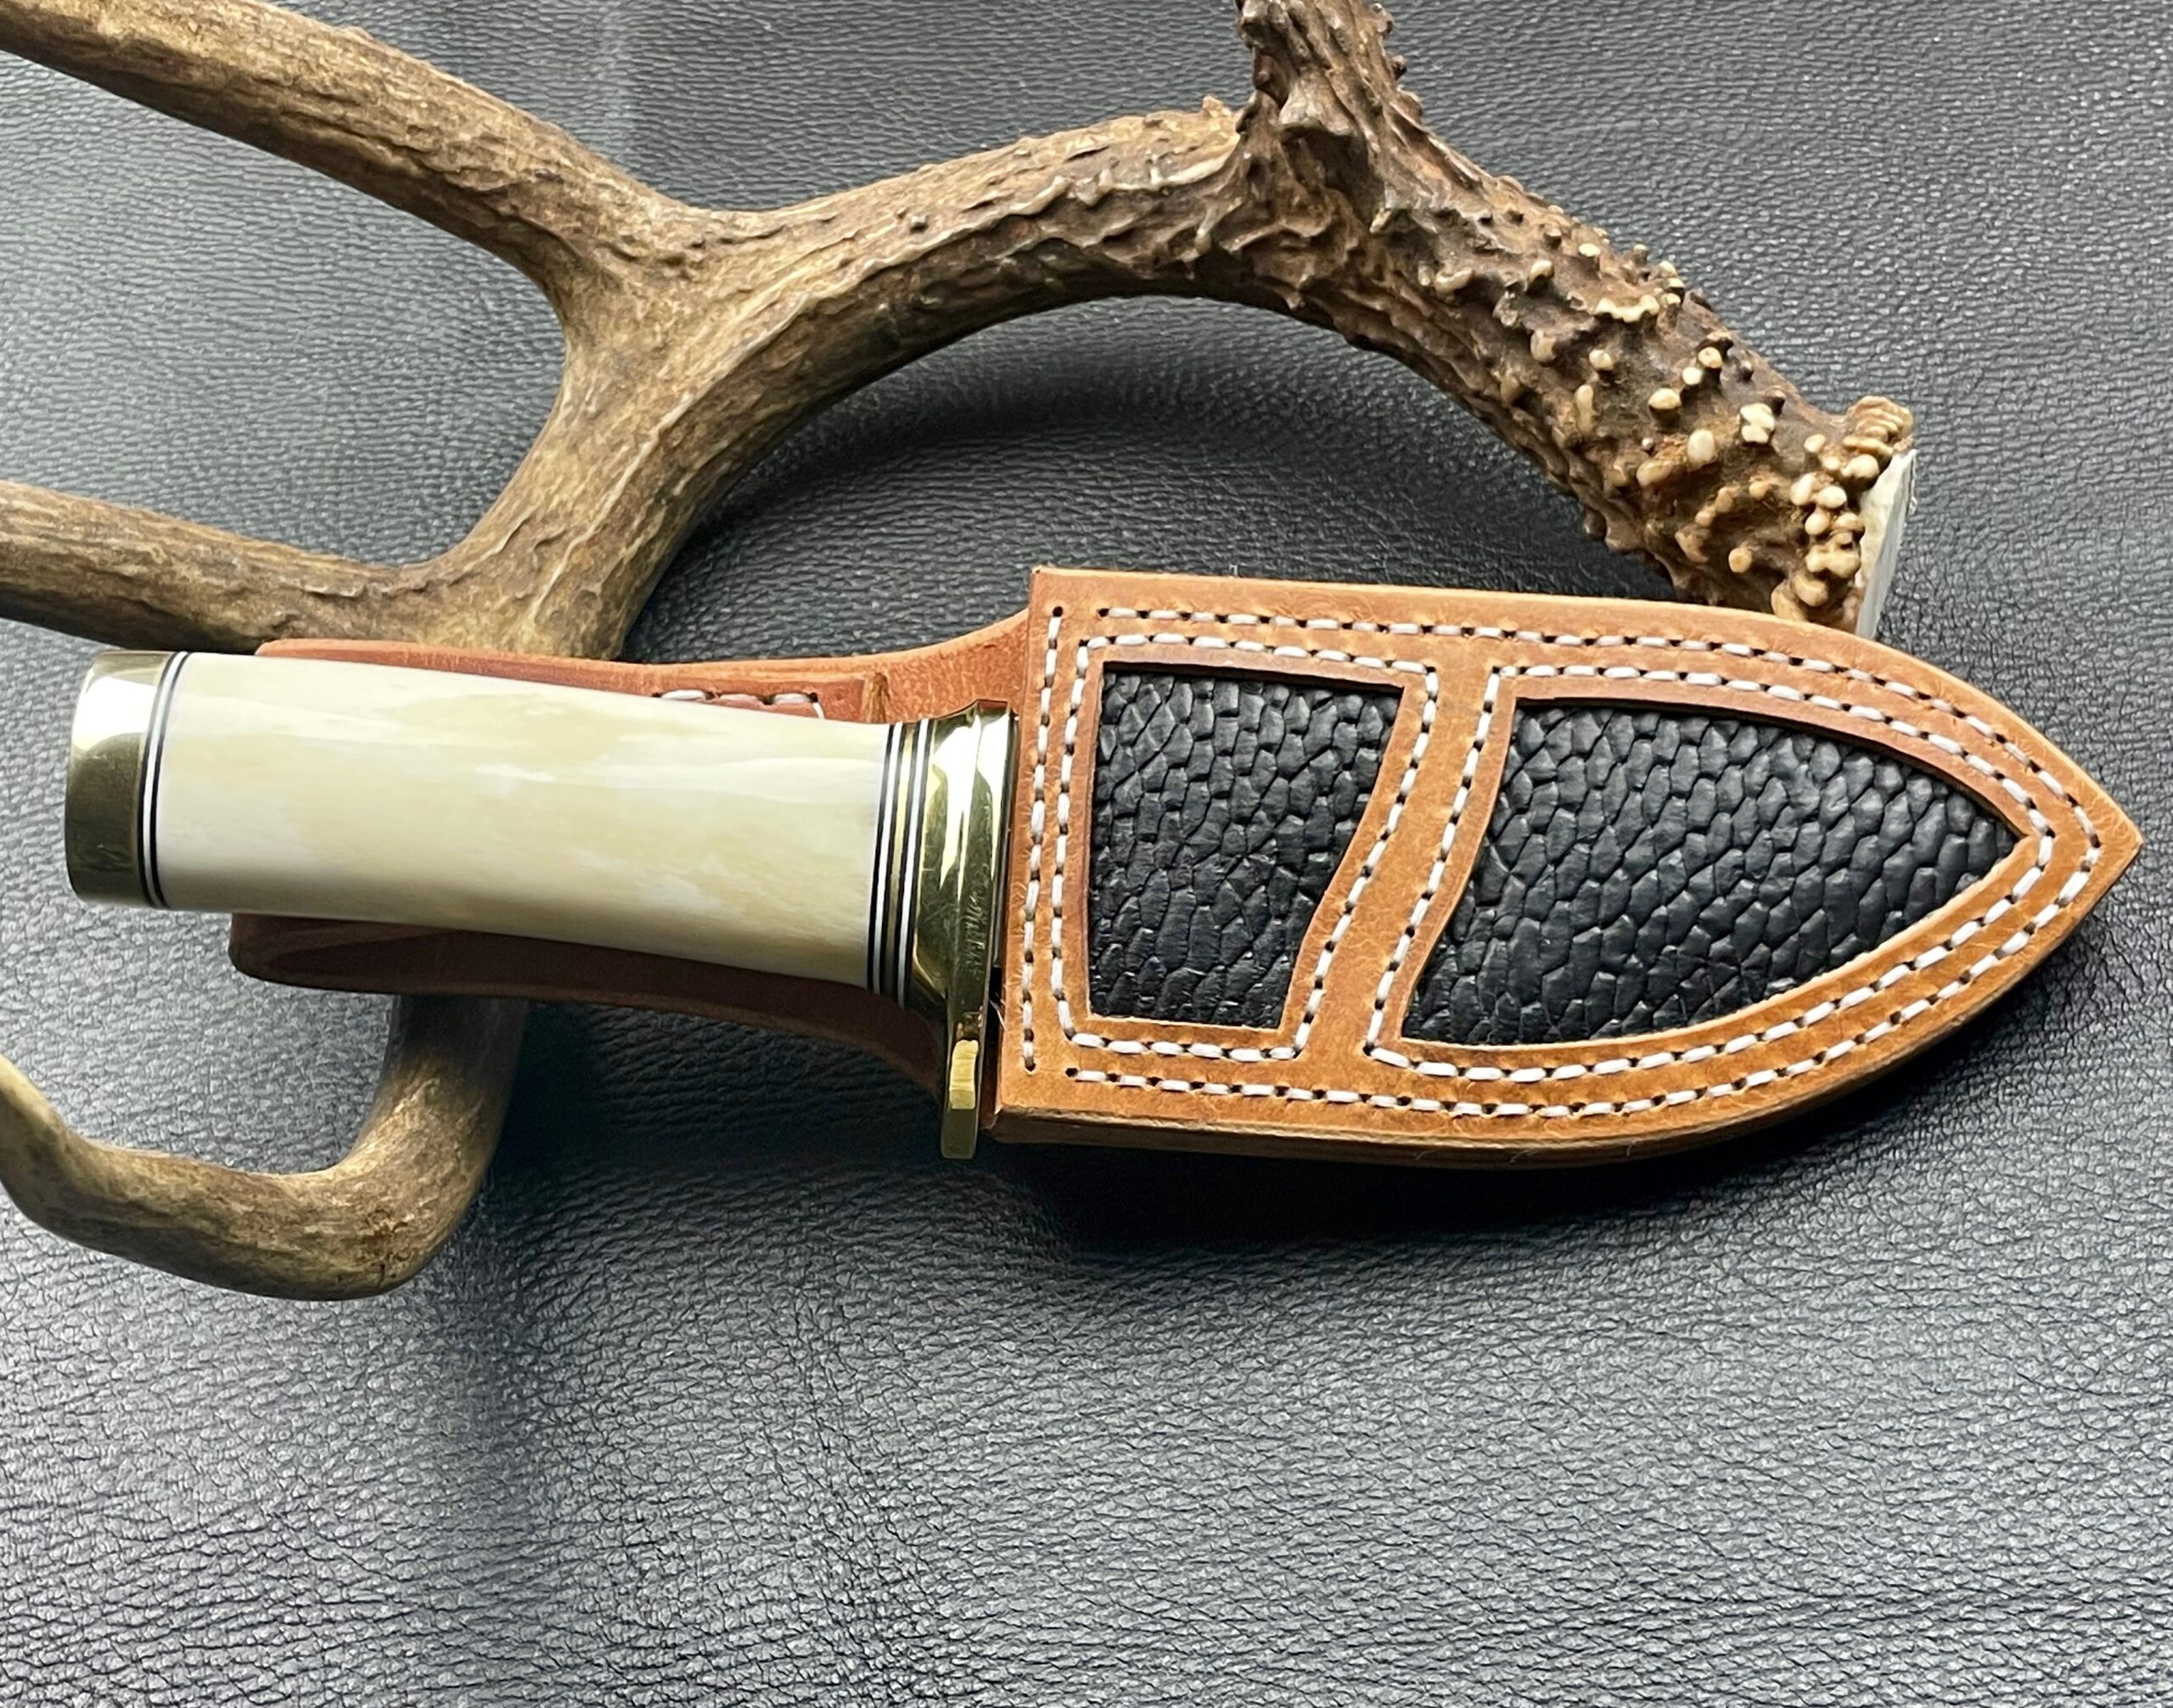
Ivory Bear Knife Sheath
Herman Oak tooling leather with a beavertail inlaid sheath. The beaver was trapped on public land in Arkansas by Brad Green.

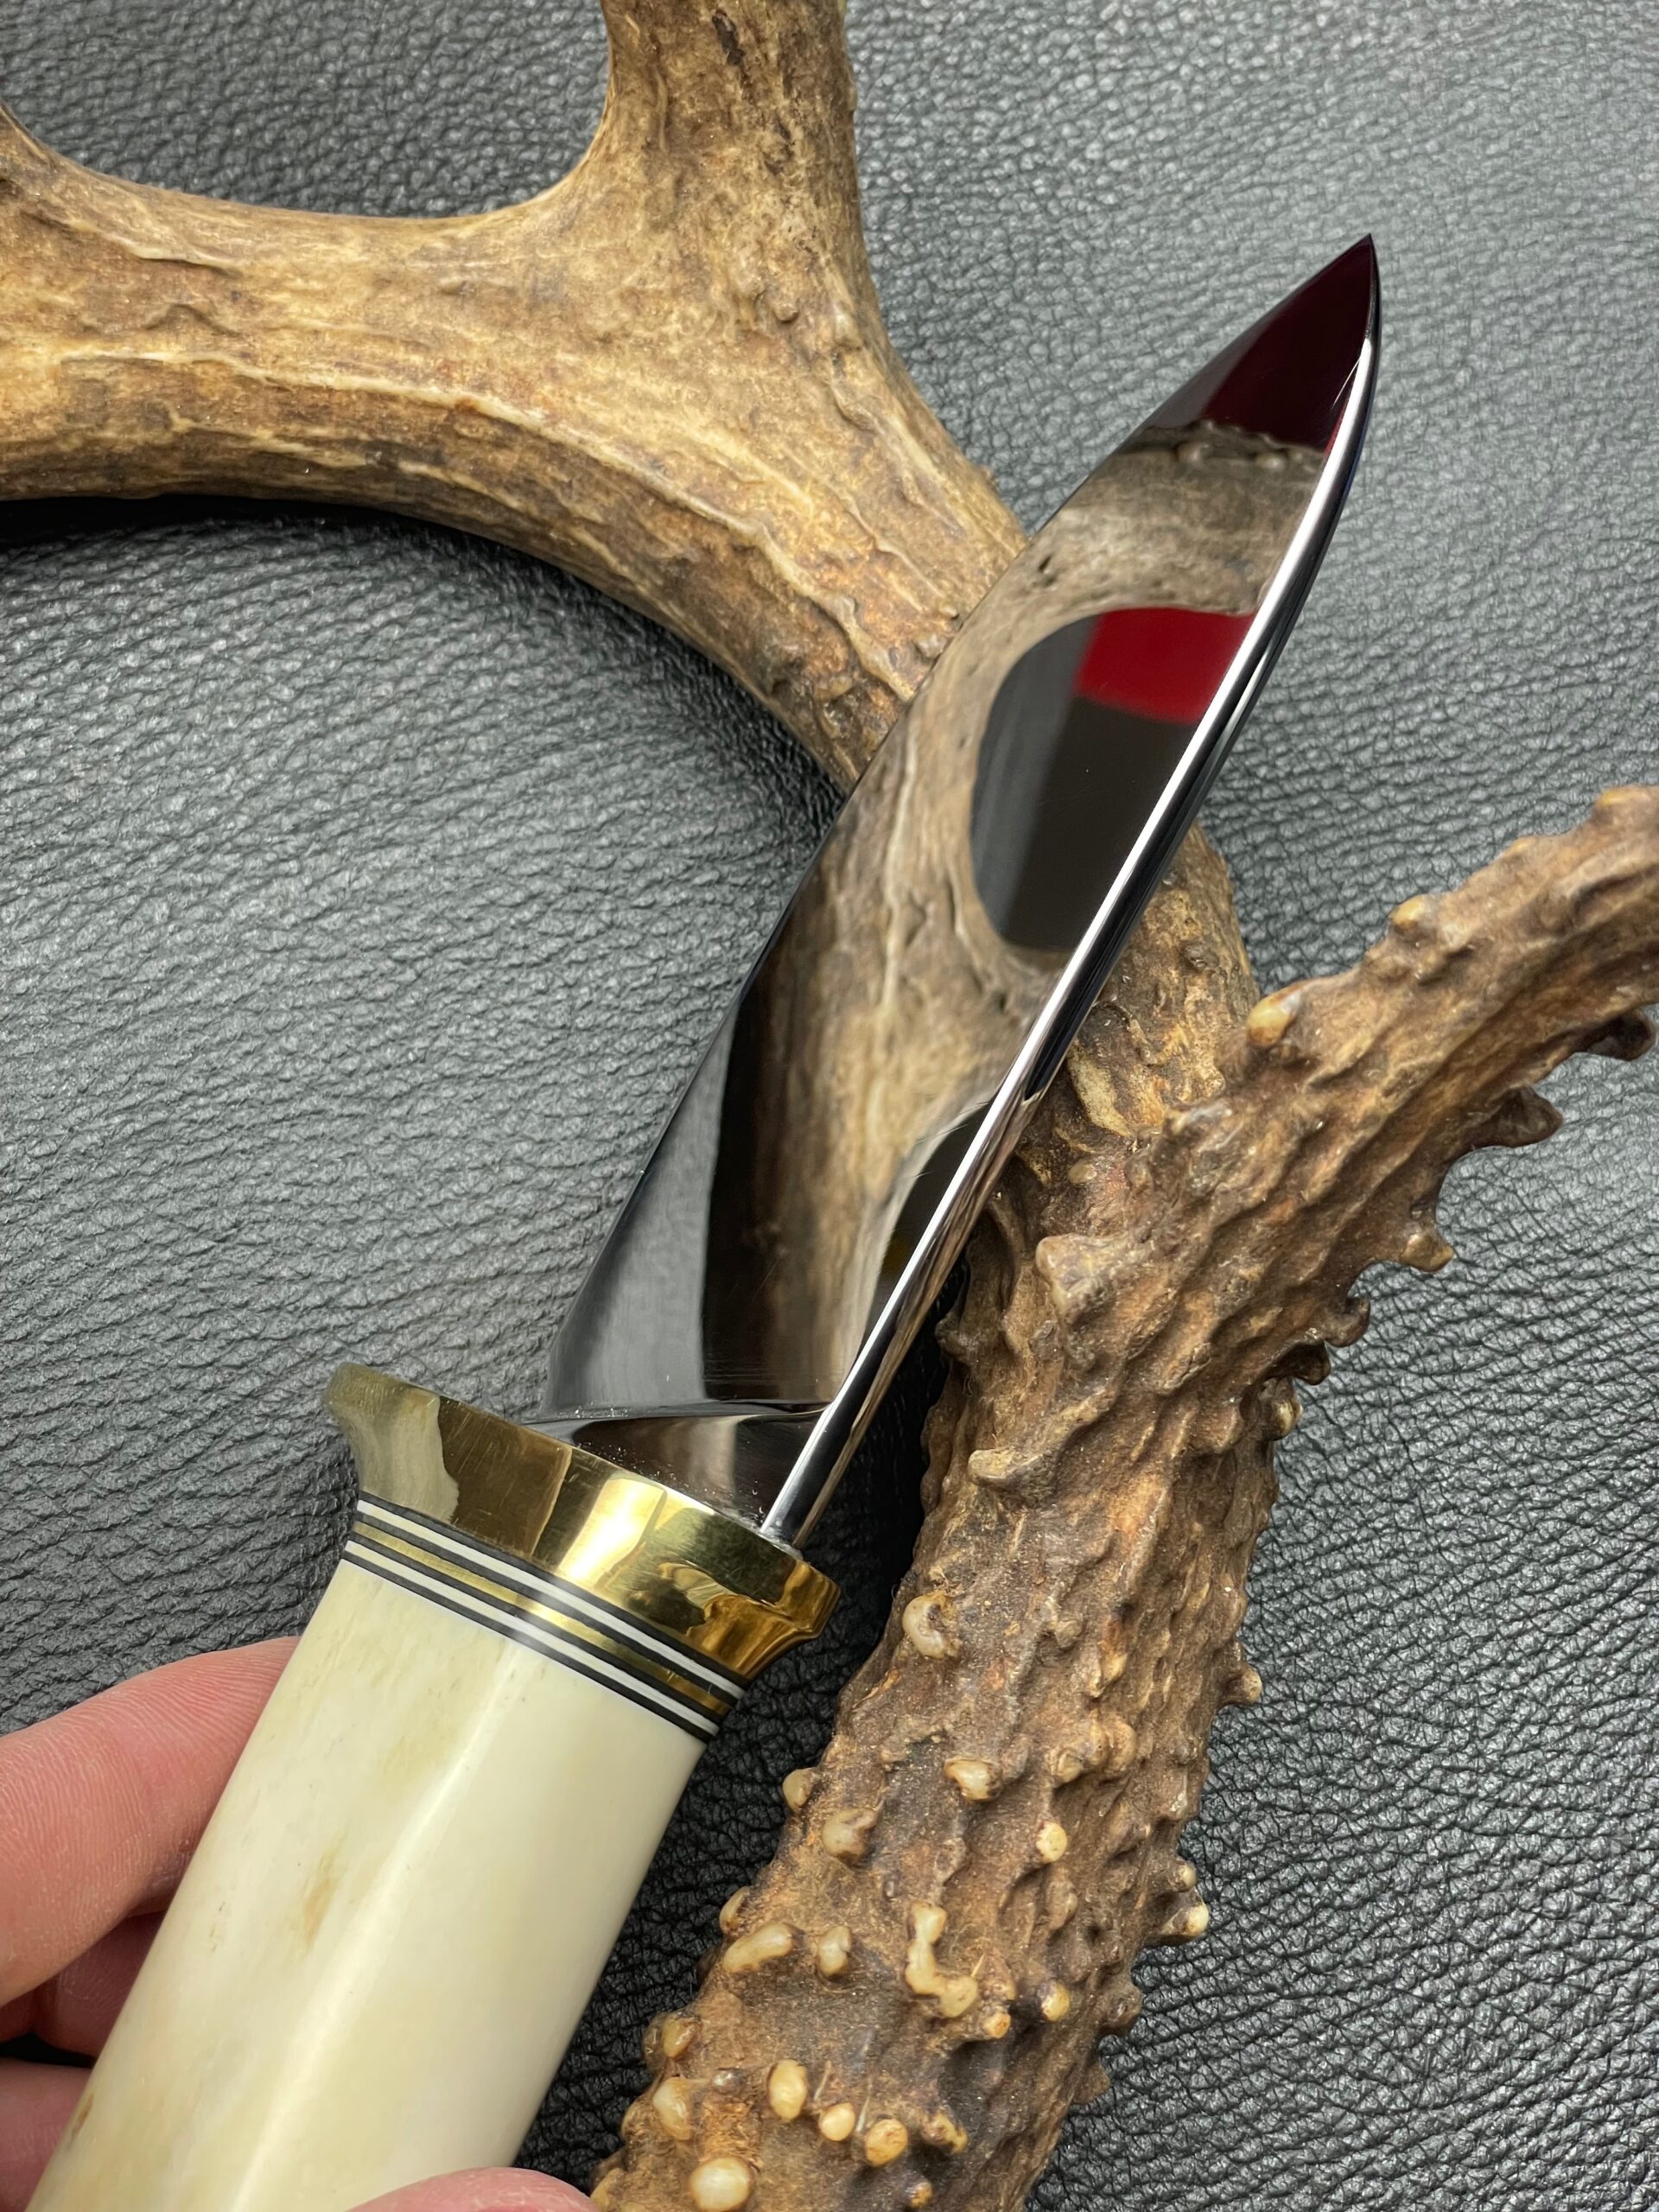
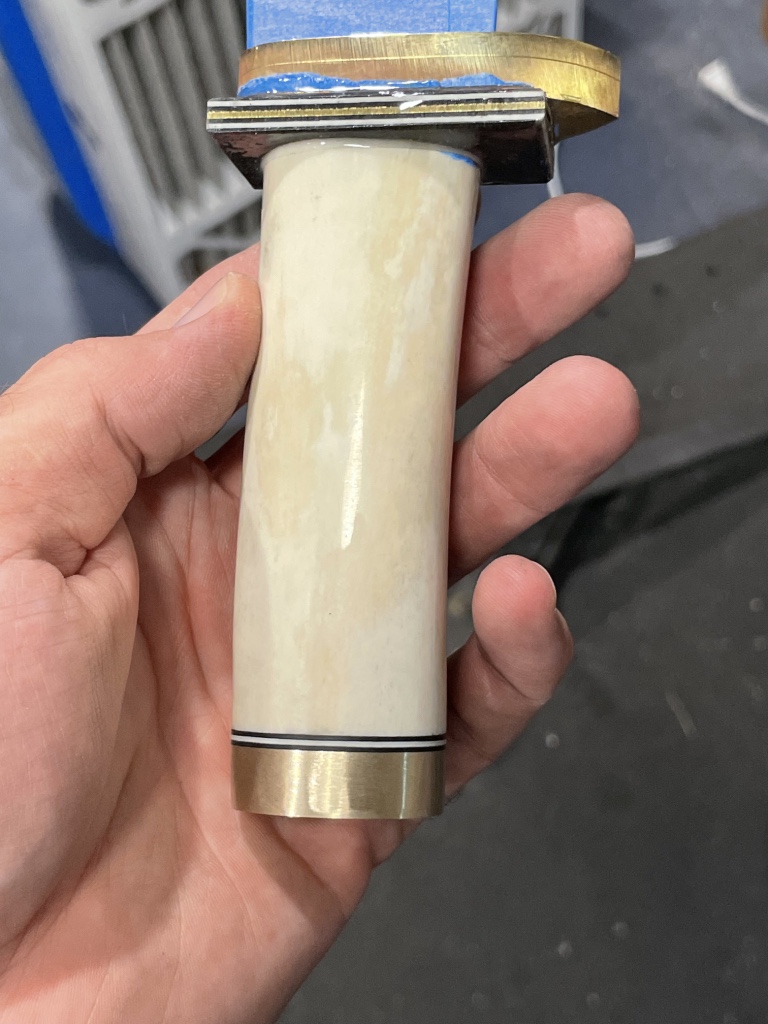
Ivory Bear Knife Handle
The bear femur used for the handle was harvested by Clay Newcomb and was donated for this build for the 2023 BHA Black Bear Bonanza.
Ivory Bear Knife Rounded Spine
The spine of the knife is fully rounded for comfort and ease of use without sharp edges except on the cutting edge.
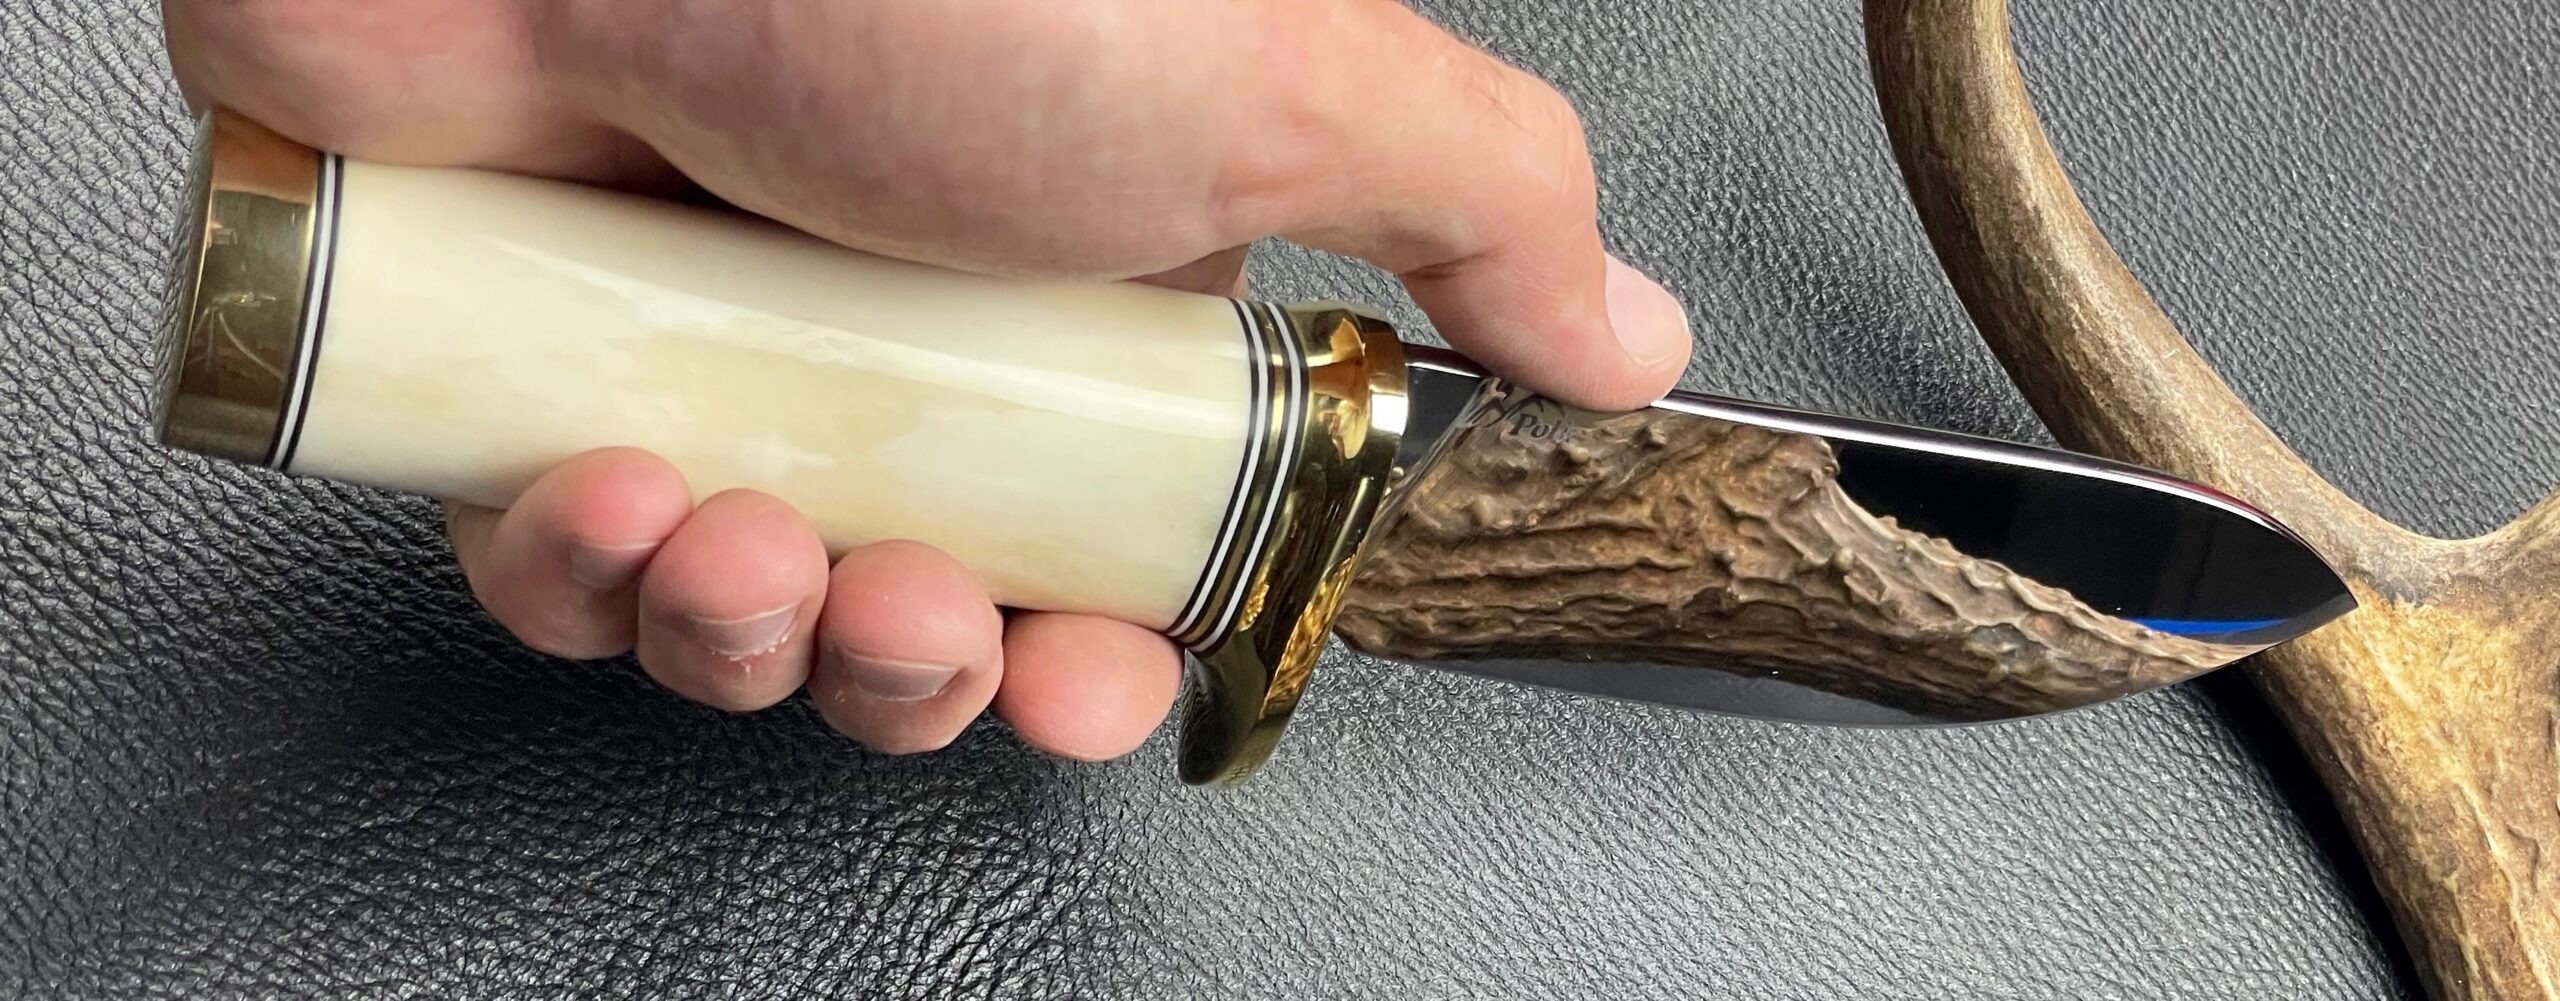
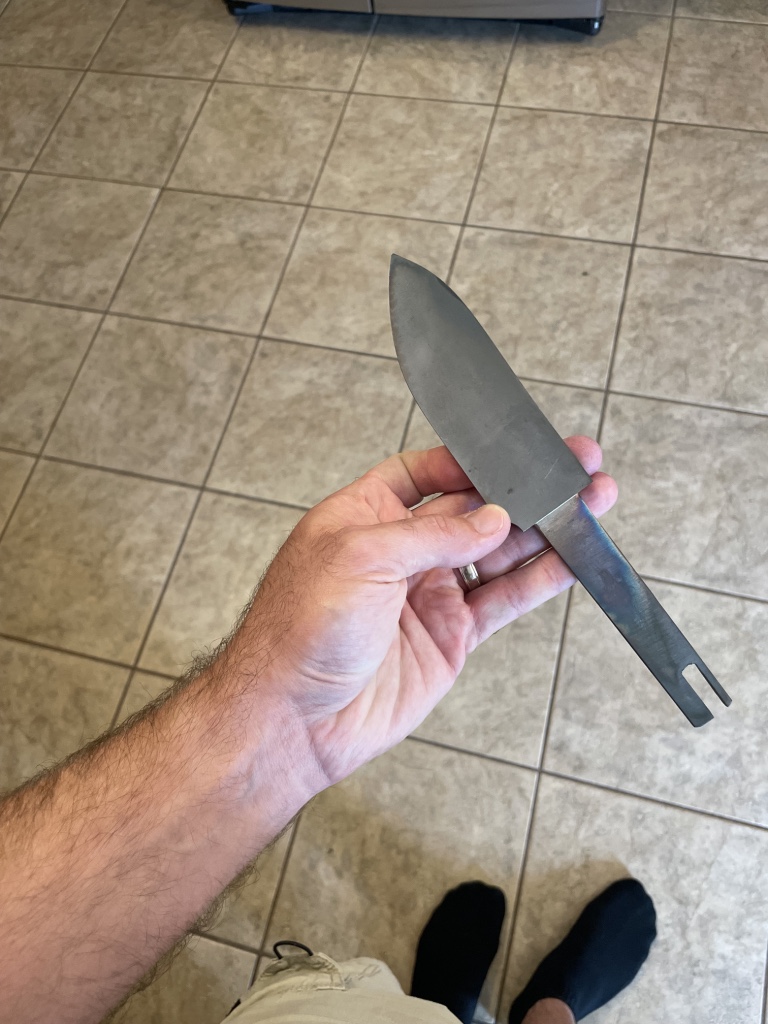
Ivory Bear Knife in Hand
A fully polished blade reduces friction when cutting, is easier to keep clean, and reduces corrosion. While it is pretty and is significantly more cost/labor to produce, it is a functionally superior choice for a refined hunting knife for the field.
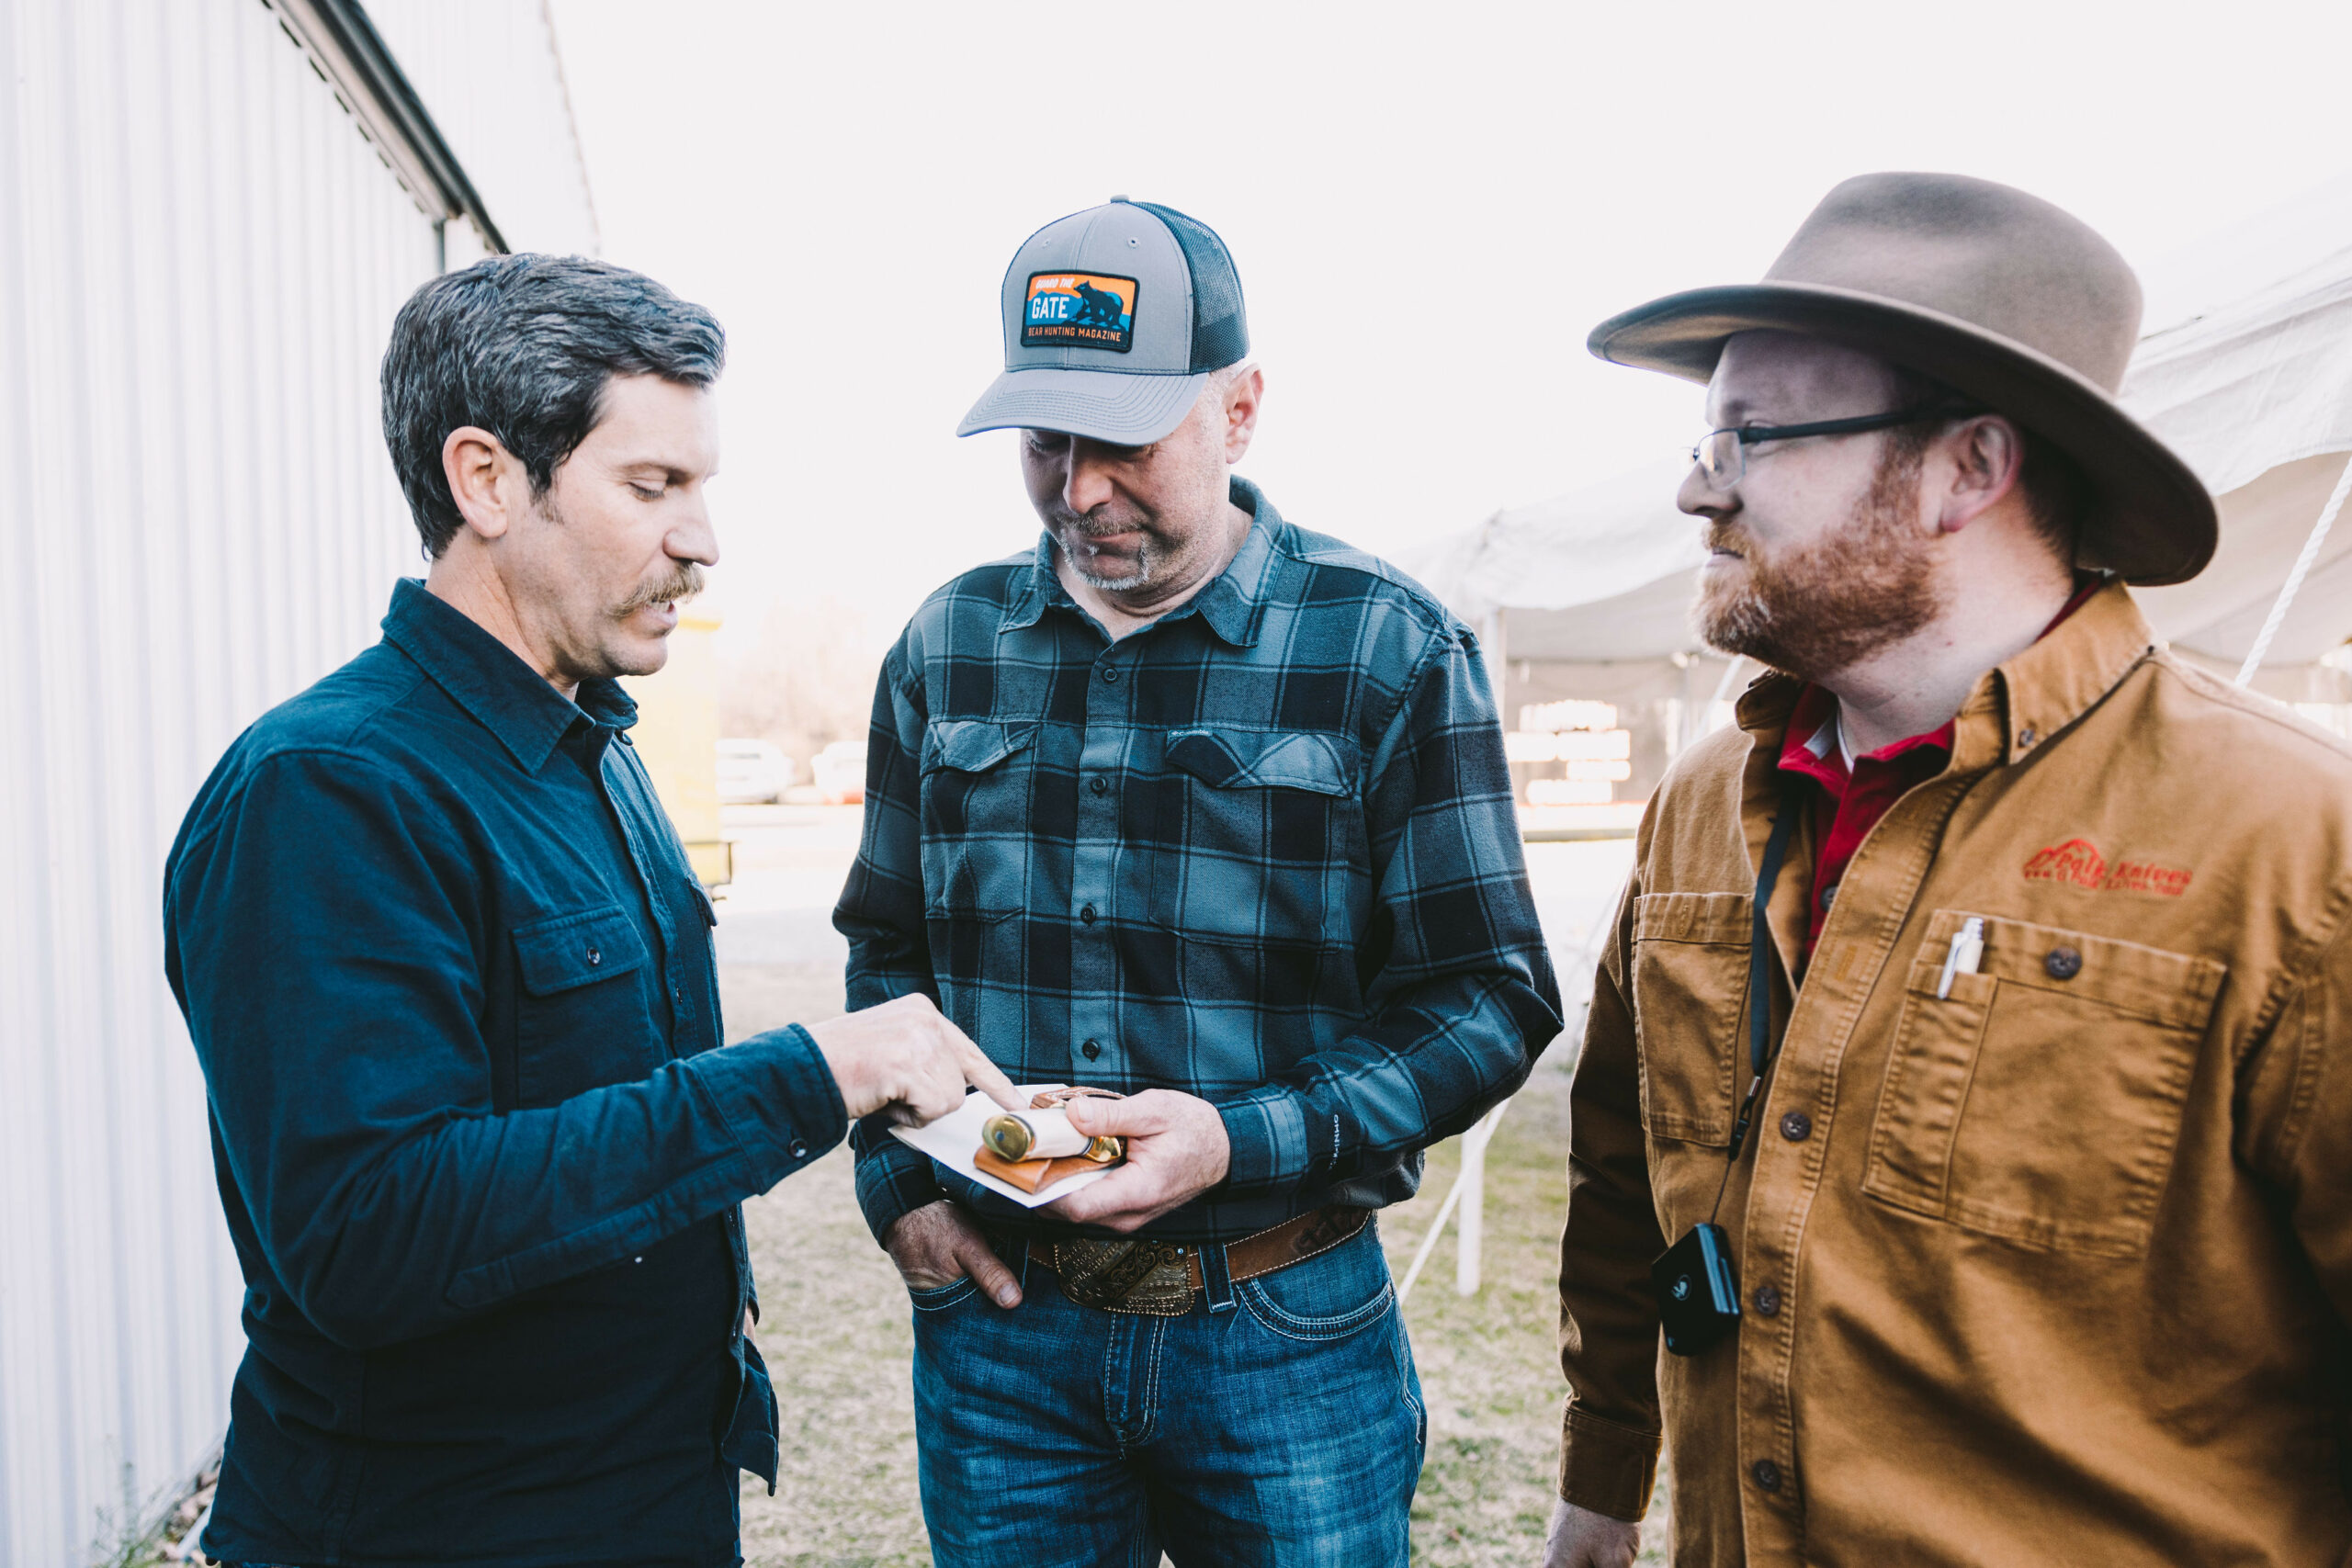
The Legend of Batman Lives On!
Clay was recounting the story of him taking the bear named Batman to Michael Huff. Batman’s femur was used as the handle material for the knife won at the 2023 Black Bear Bonanza.
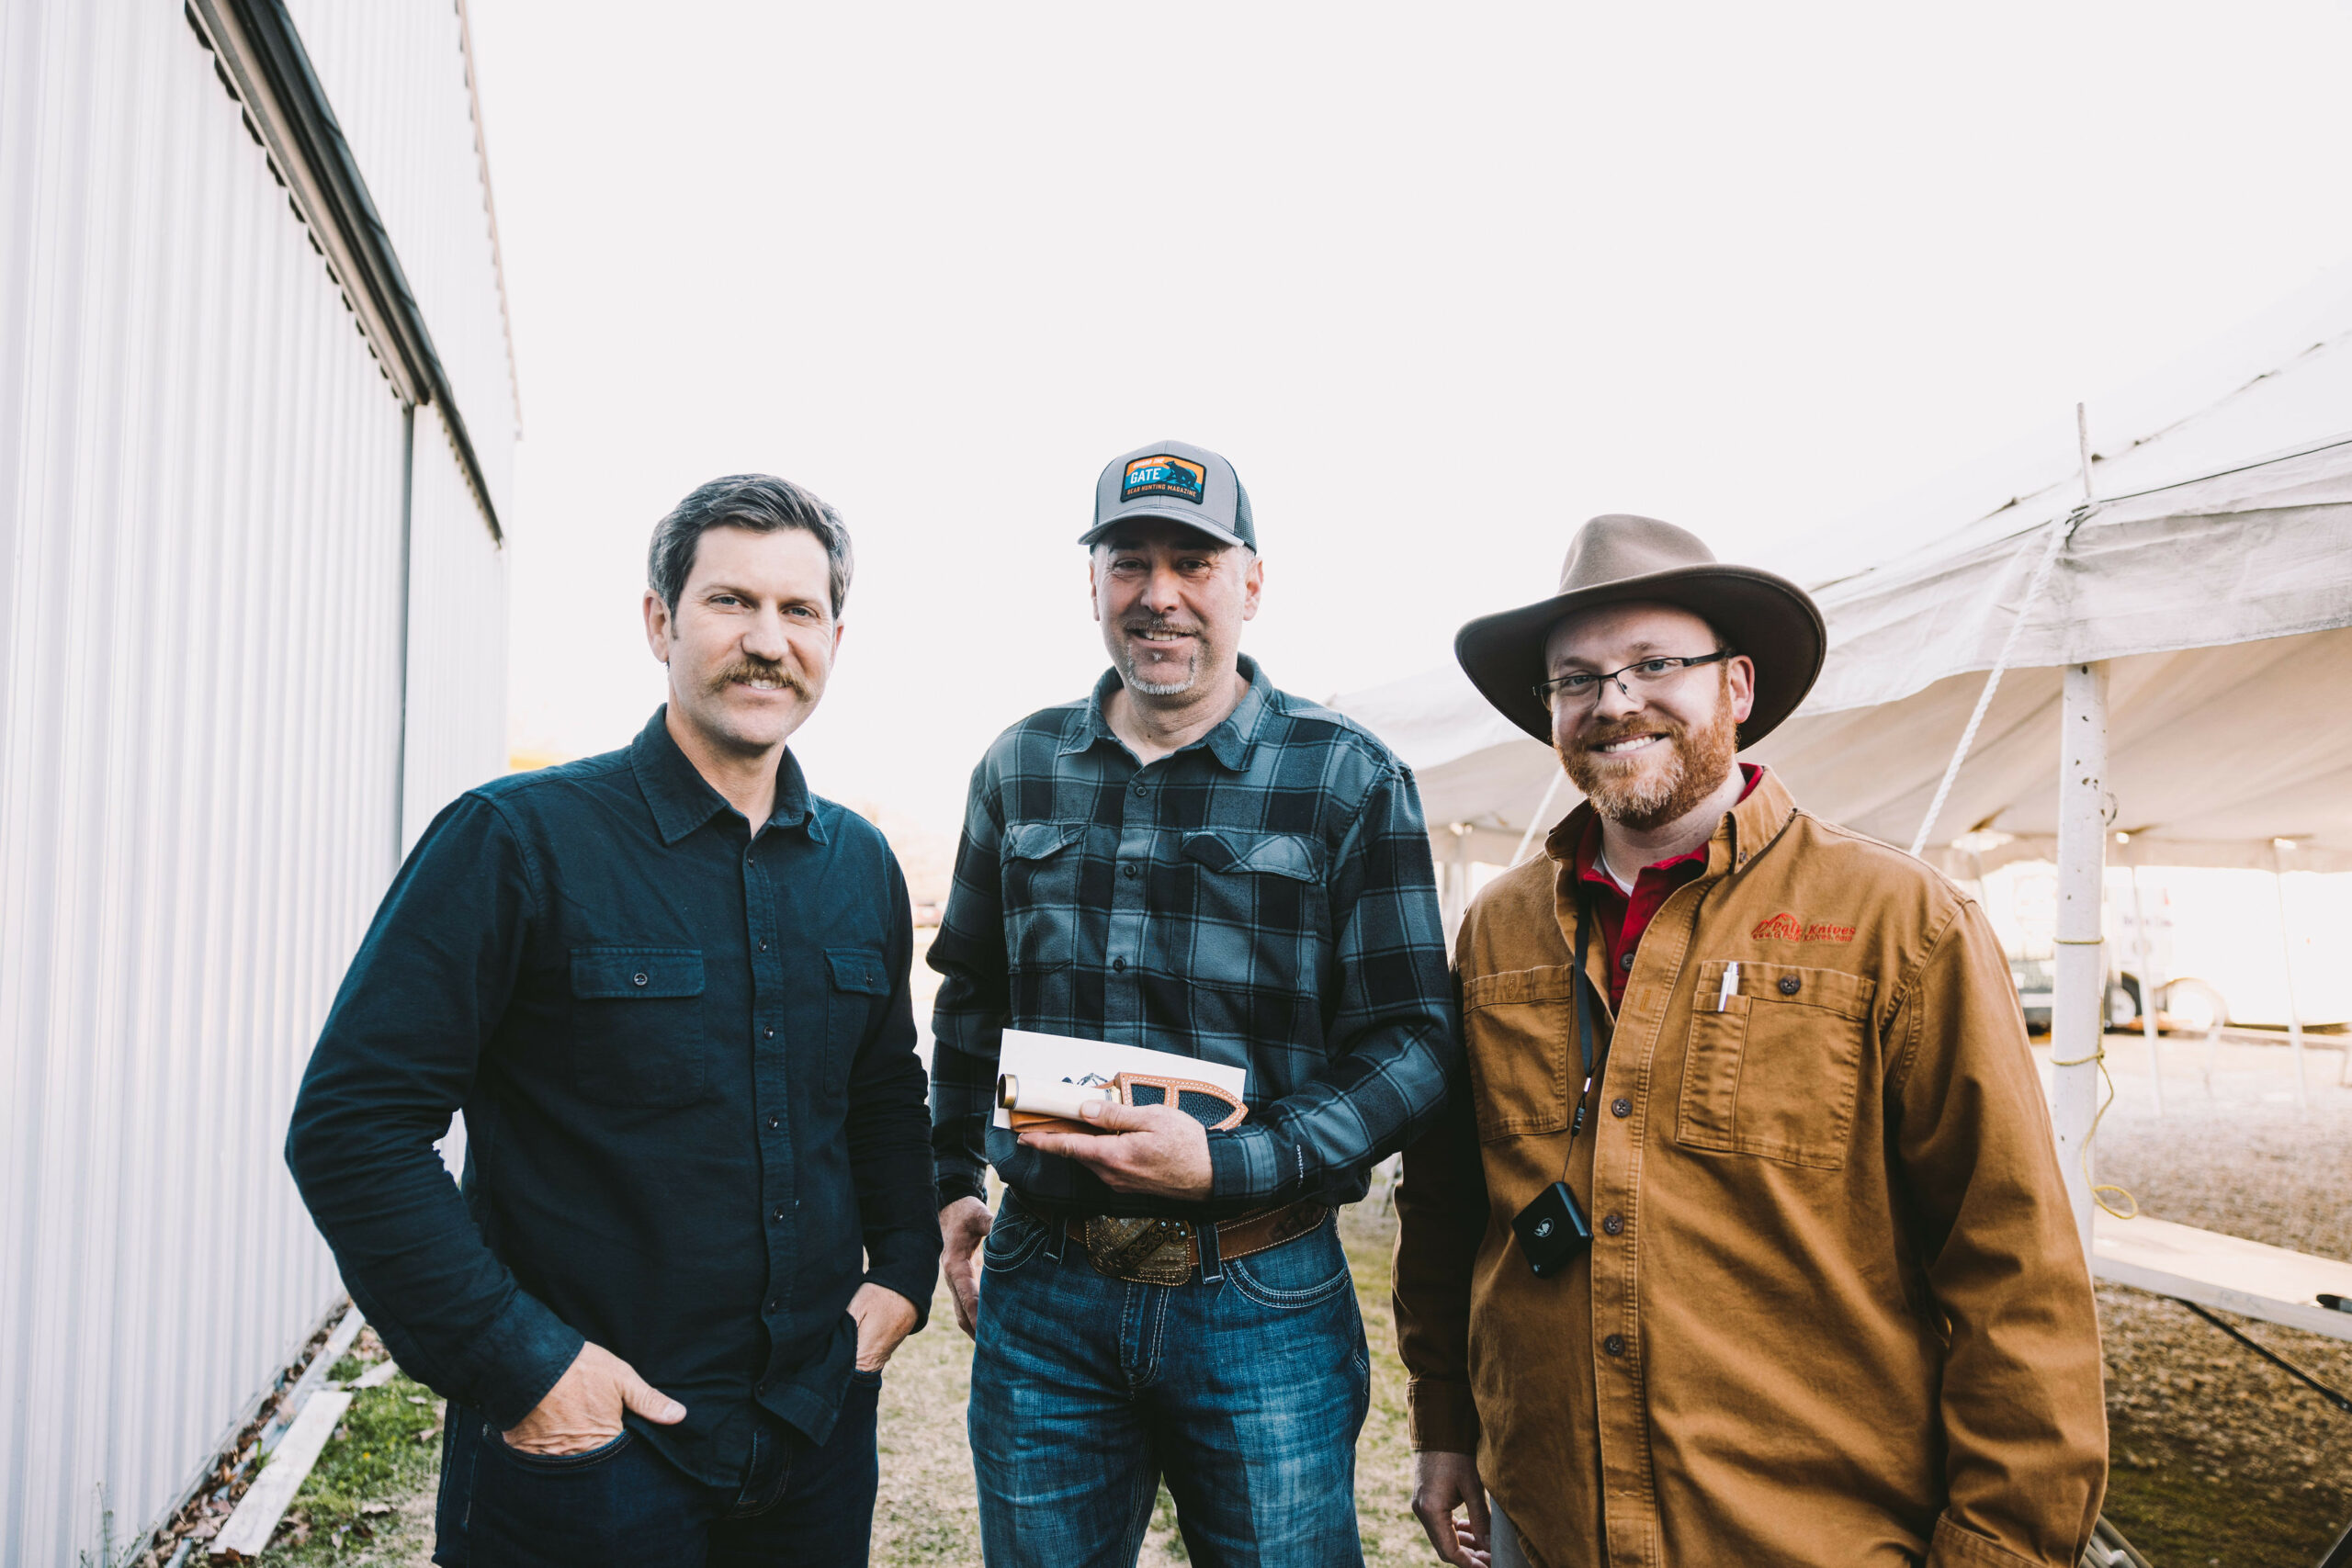
Batman is Handed off to Michael Huff
A group photo with Clay Newcomb (left), Michael Huff (center), and Garrett Polk (right). Clay donated the bone in the handle to me, I made the knife, and now it belongs to Michael.
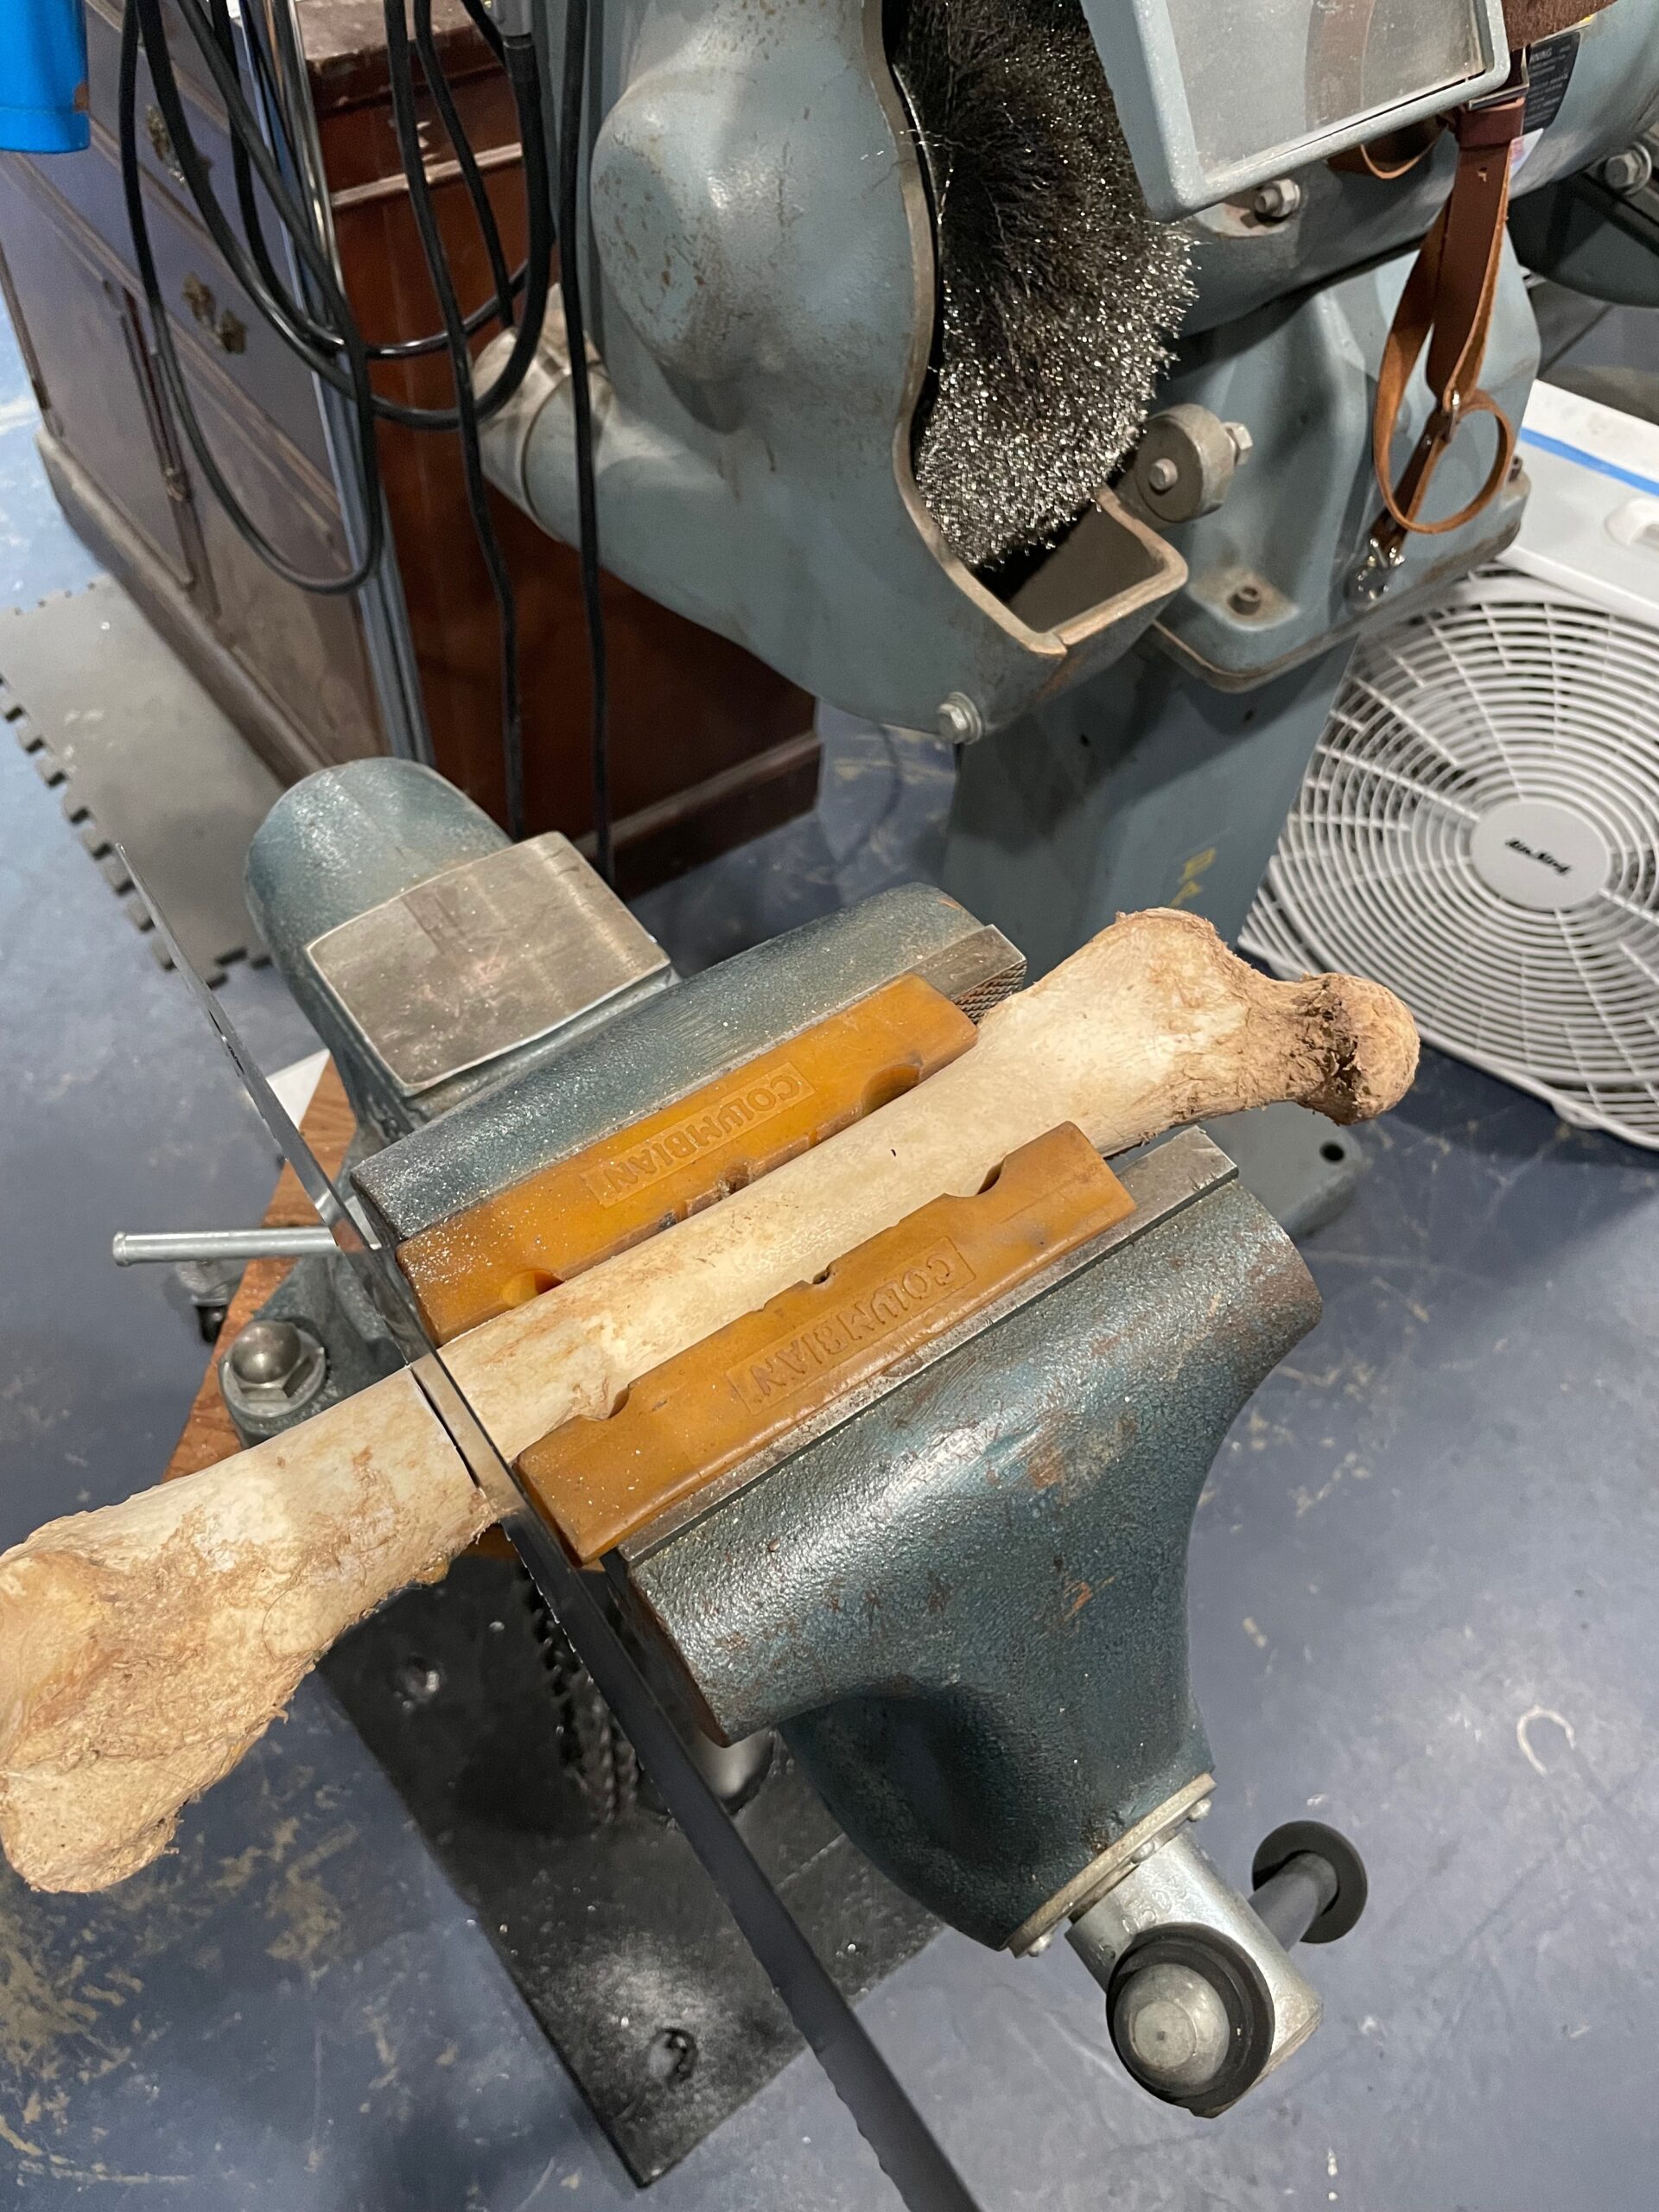
Sawing the Bone
After feeling the bone for the section that felt good in hand both right and left handed, It was sawed to harvest the “just right” portion.
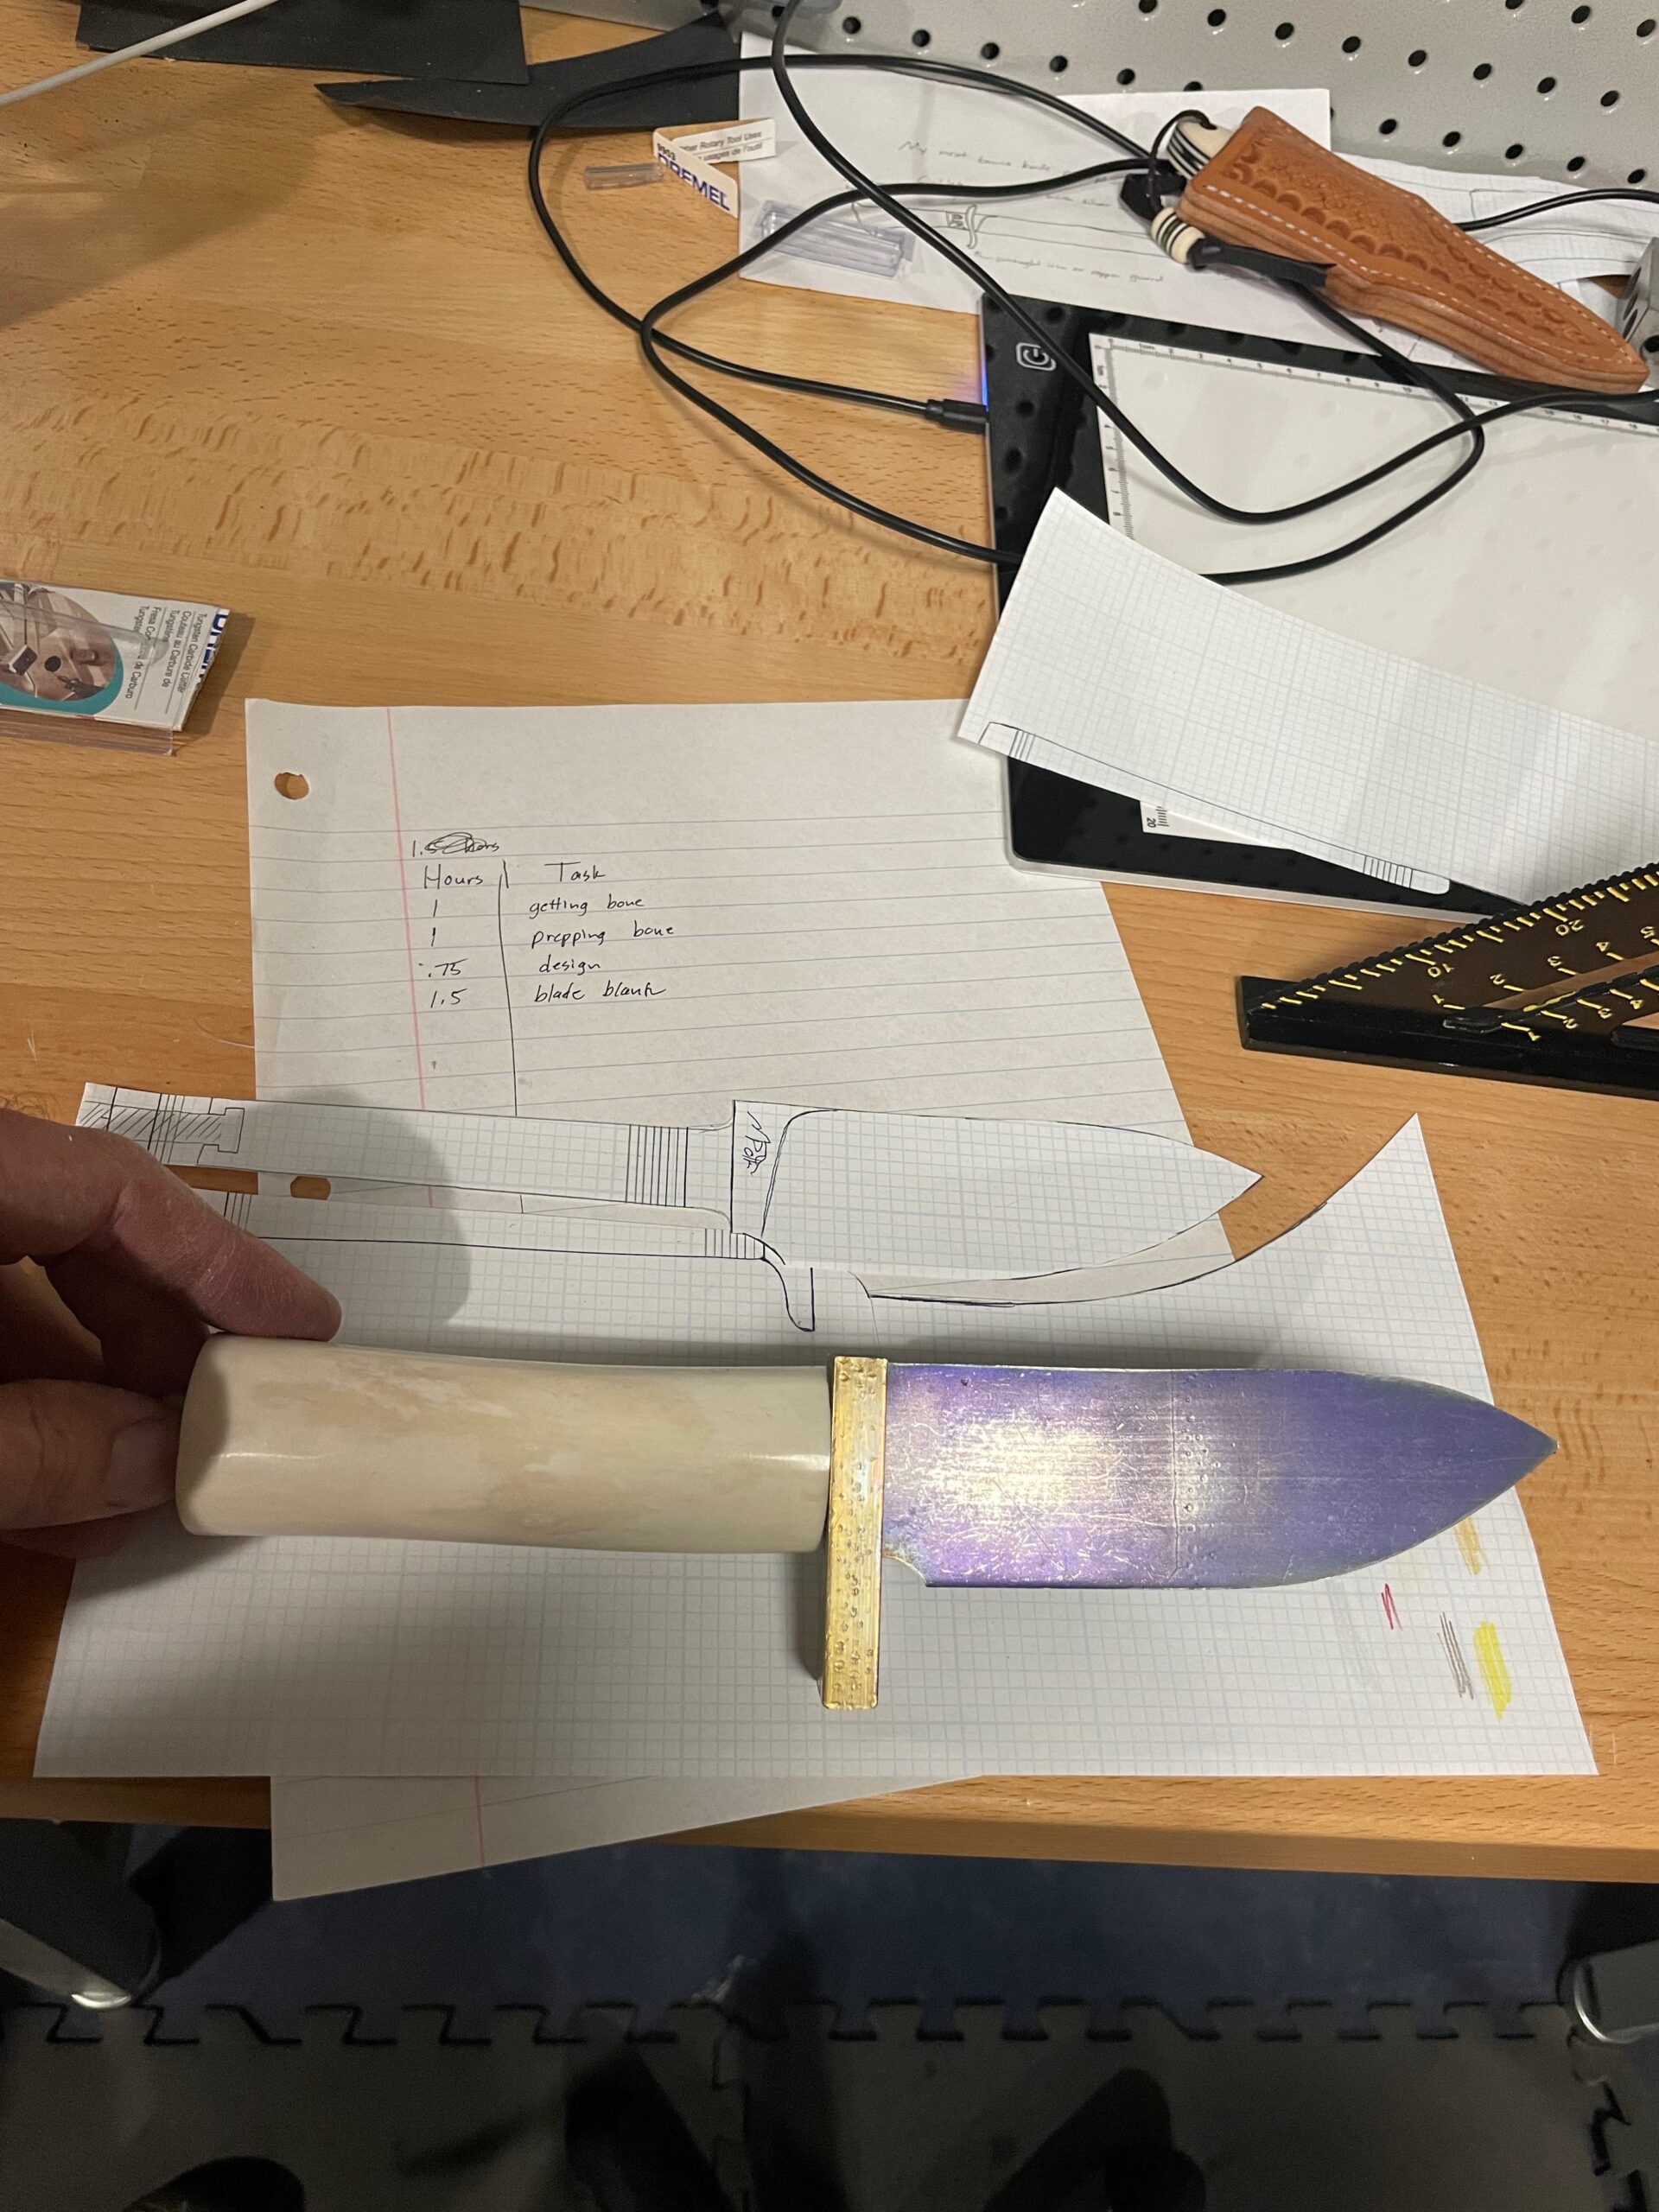
Designing the Ivory Bear Knife
After getting the bone for the handle, a plan was drawn to fit the bone and be proportional to the handle material provided.

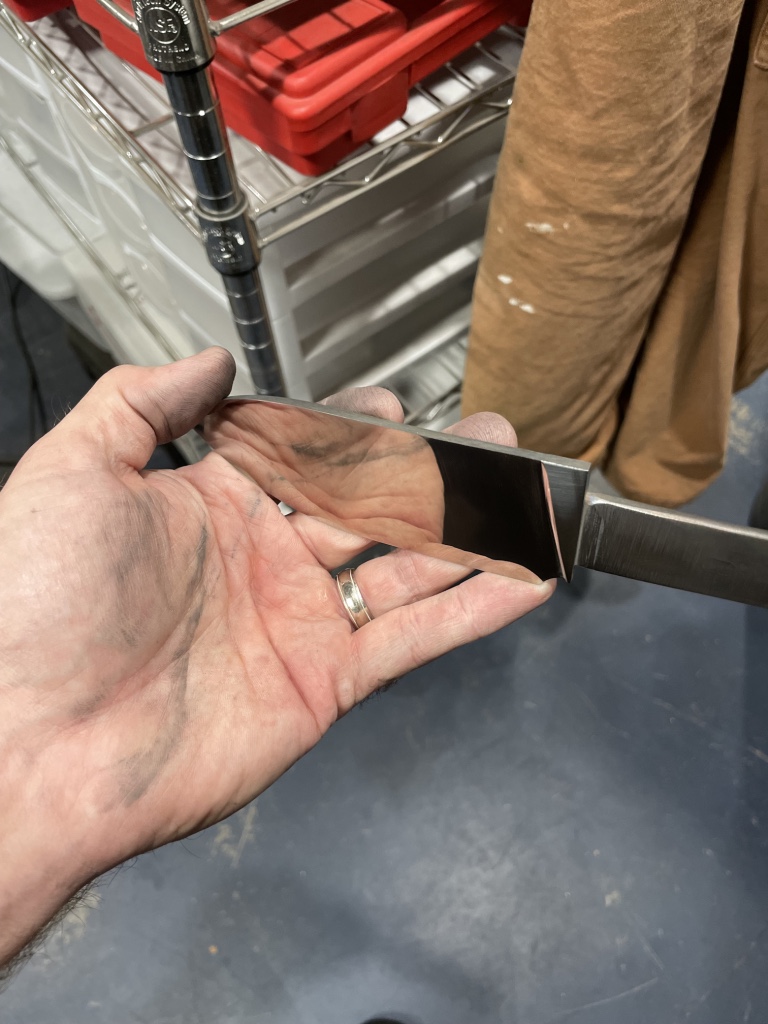
Prepping for Guard Fitment
I mark the blade with sharpie and scribe a line for where I want the guard to fit that is perpendicular to the midline of the blade.
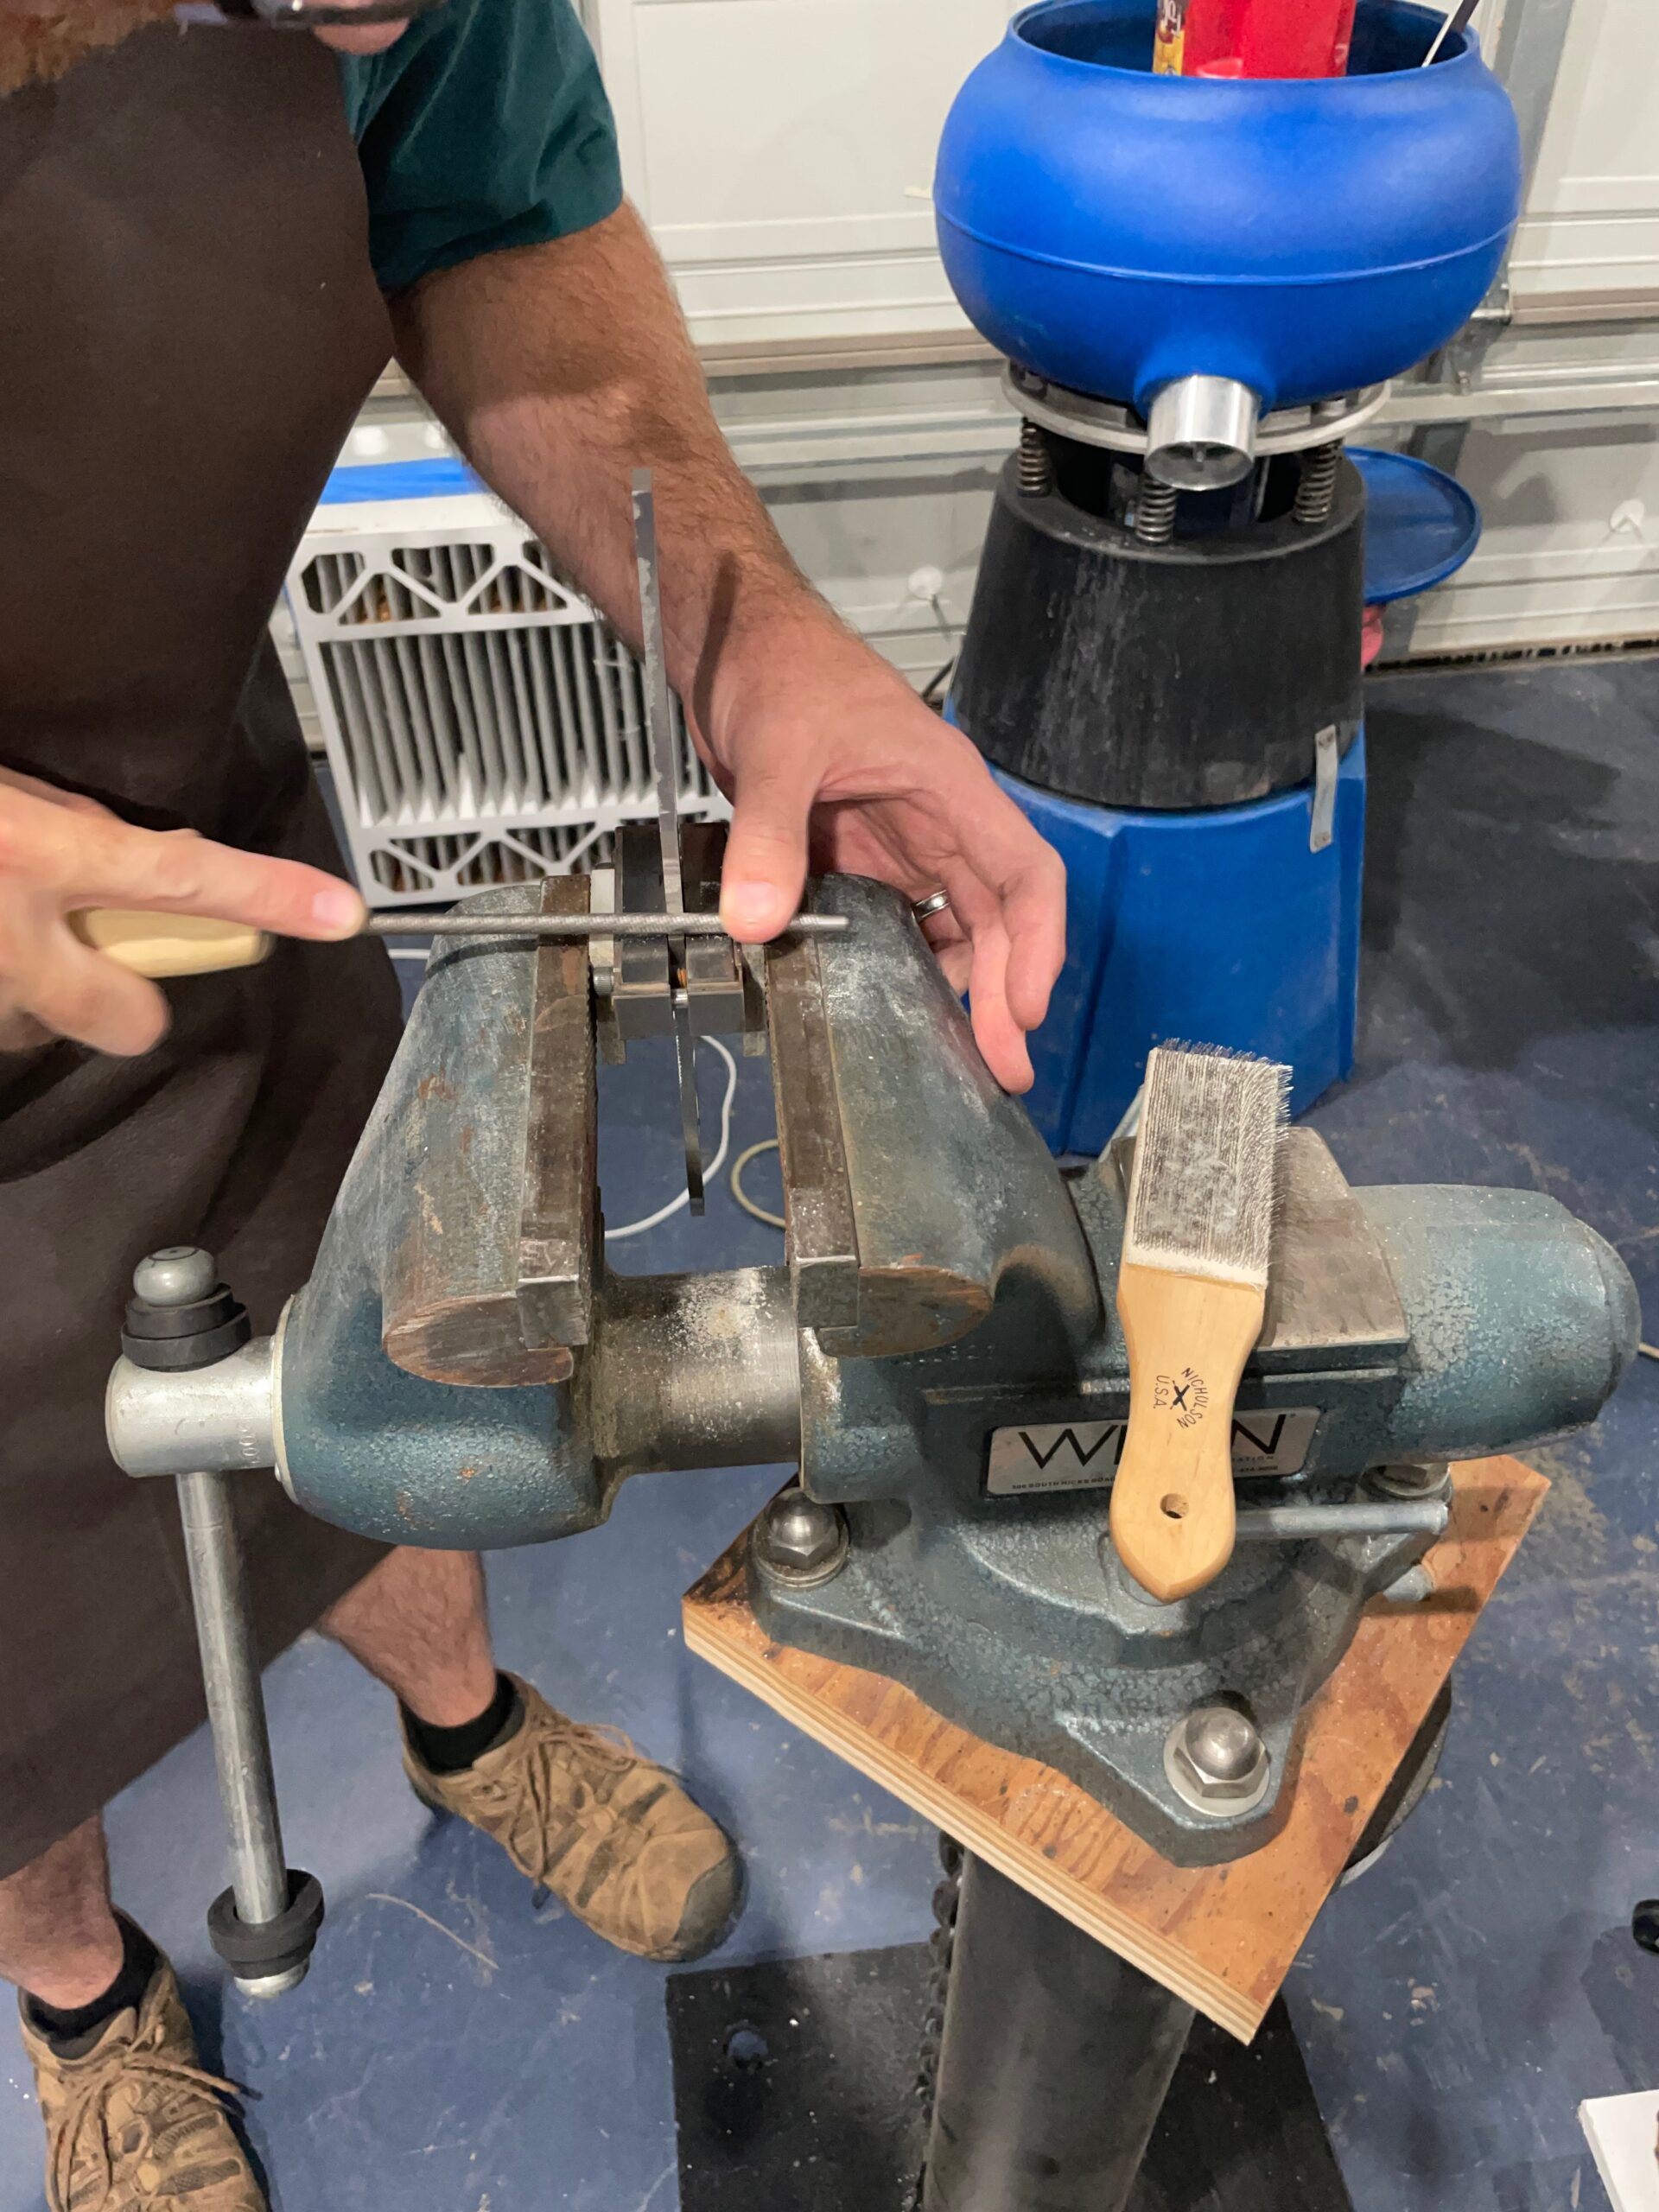
Filing the Blade for Guard Fitment
The back of the knife is filed flush and parallel using a custom made, carbide faced file guide and Nicholson bastard file to ensure proper guard fitment.

Filing the Blade for Guard Fitment
The back of the knife is filed flush and parallel using a custom made, carbide faced file guide and Nicholson bastard file to ensure proper guard fitment.
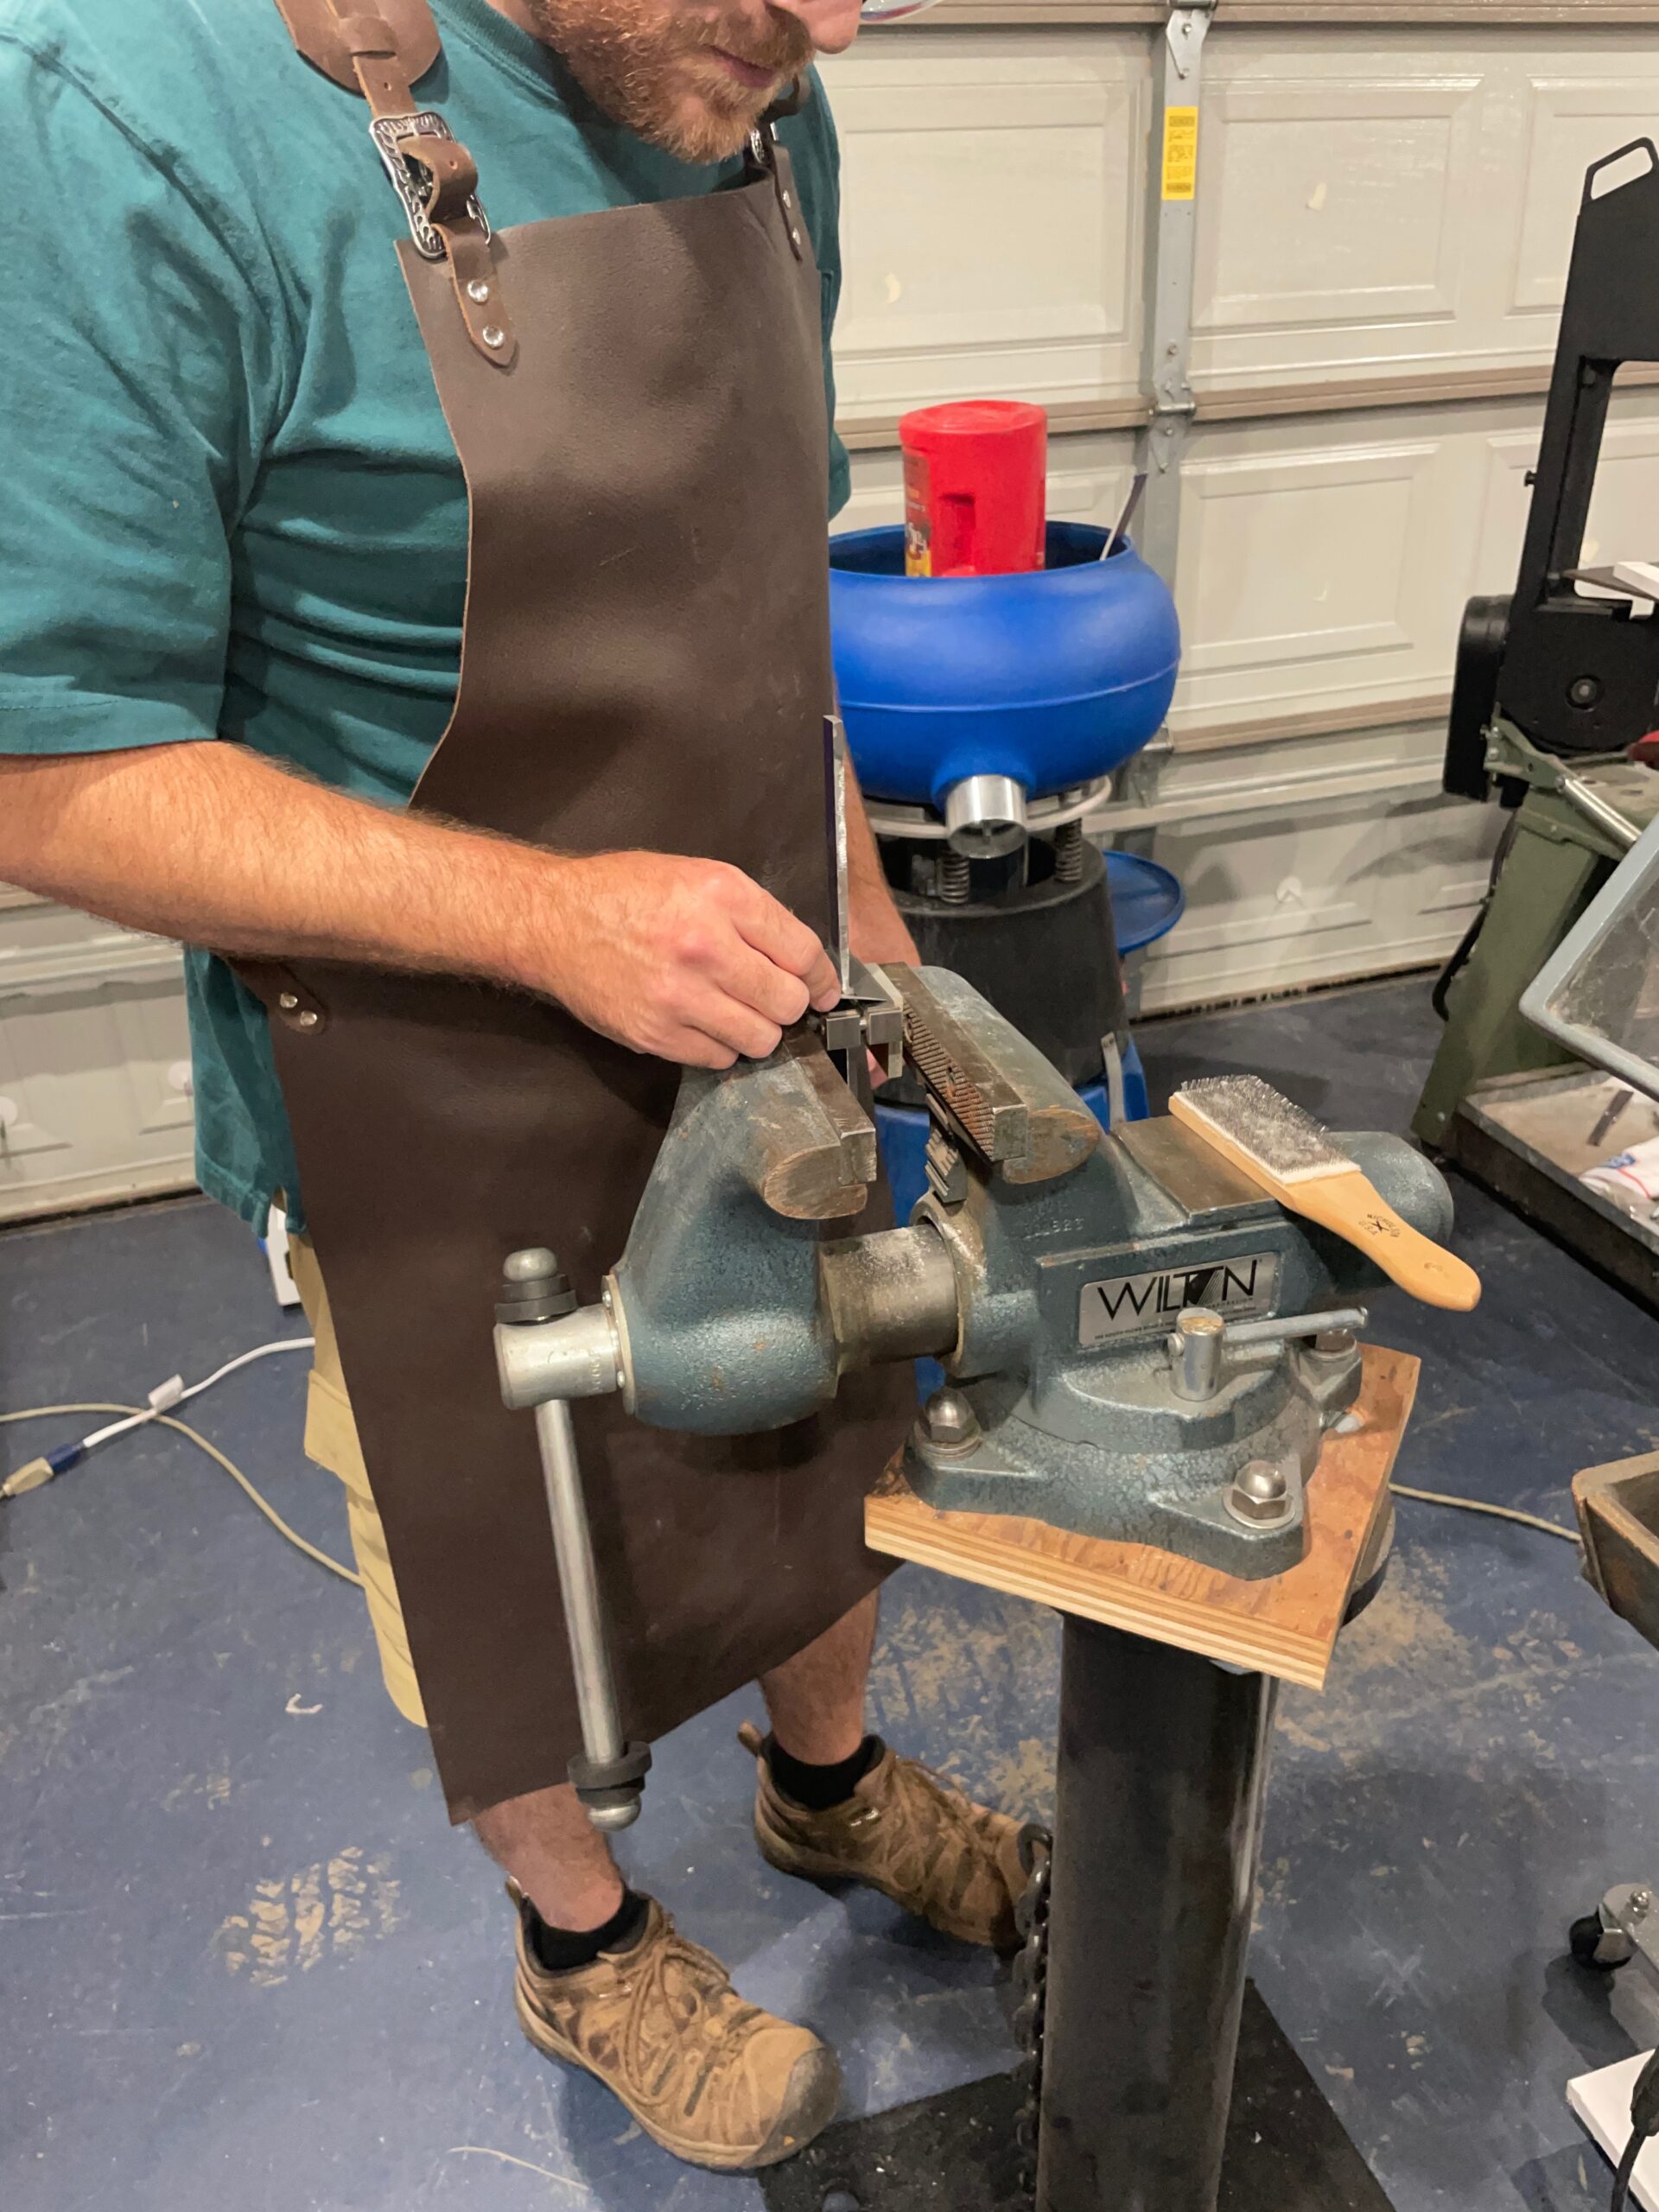
Checking for Guard Fitment
The back of the blade is checked for a flush fit using a razor blade slid along the carbide file guide. File until the razor no longer catches on the back of the blade.
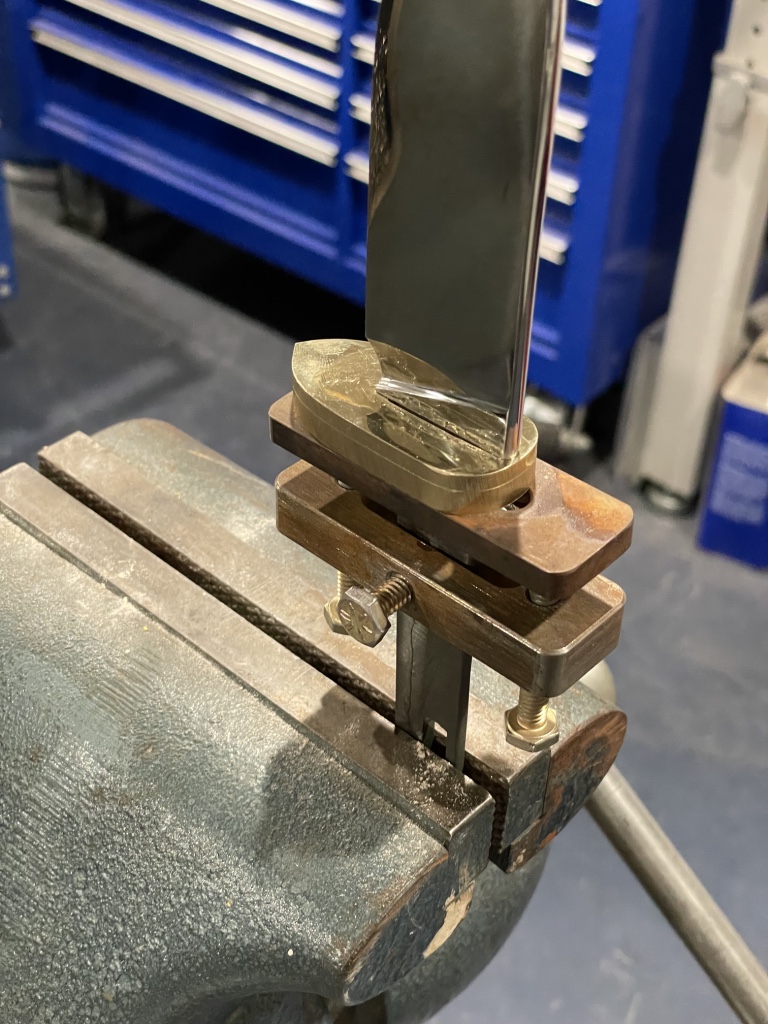
Guard Fitment
Filing the guard to fit the tang tightly takes time and patience but is important for a strong mechanical fitment of the guard to the tang.
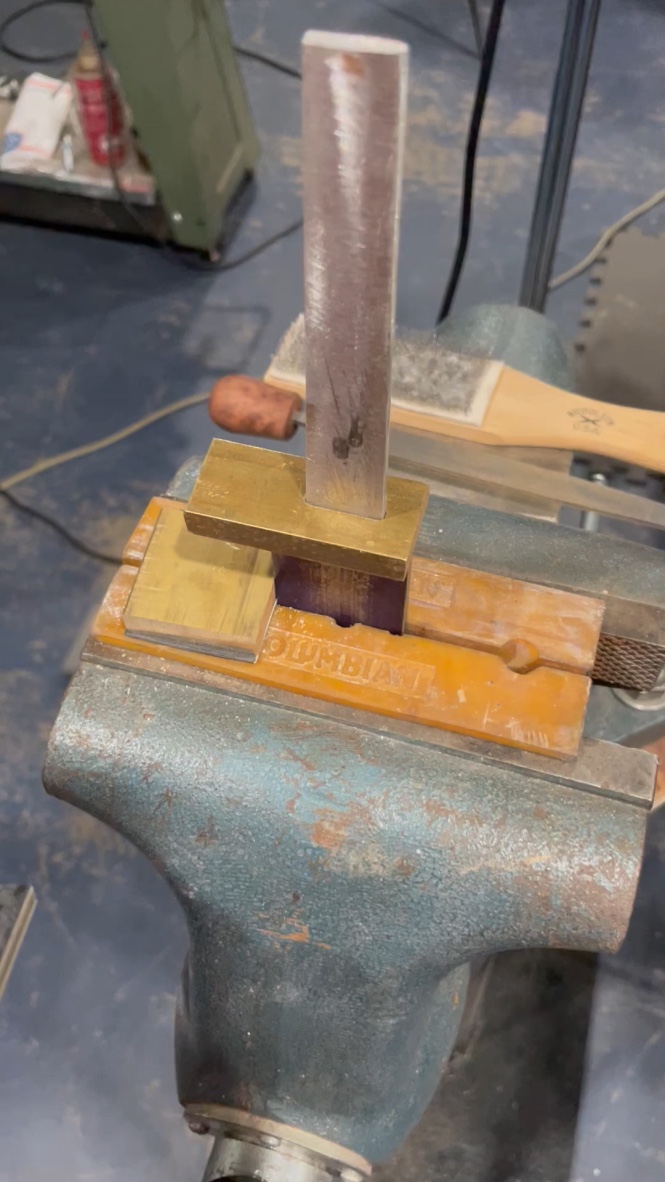
Guard Fitment
Filing the guard to fit the tang tightly takes time and patience but is important for a strong mechanical fitment of the guard to the tang.
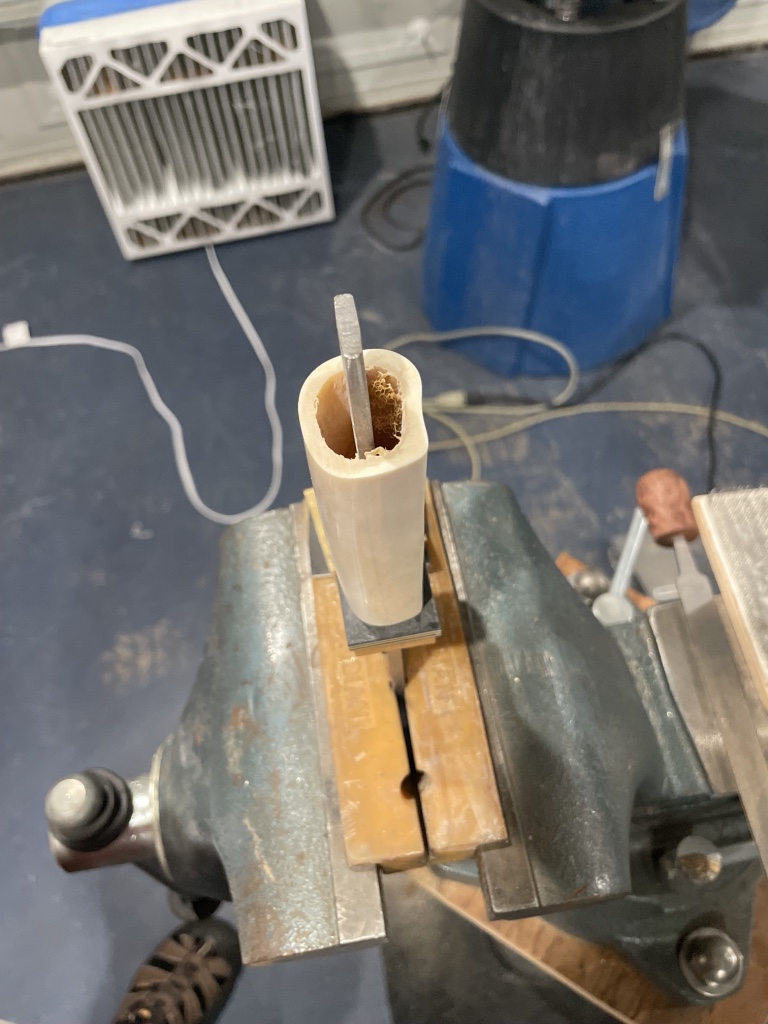
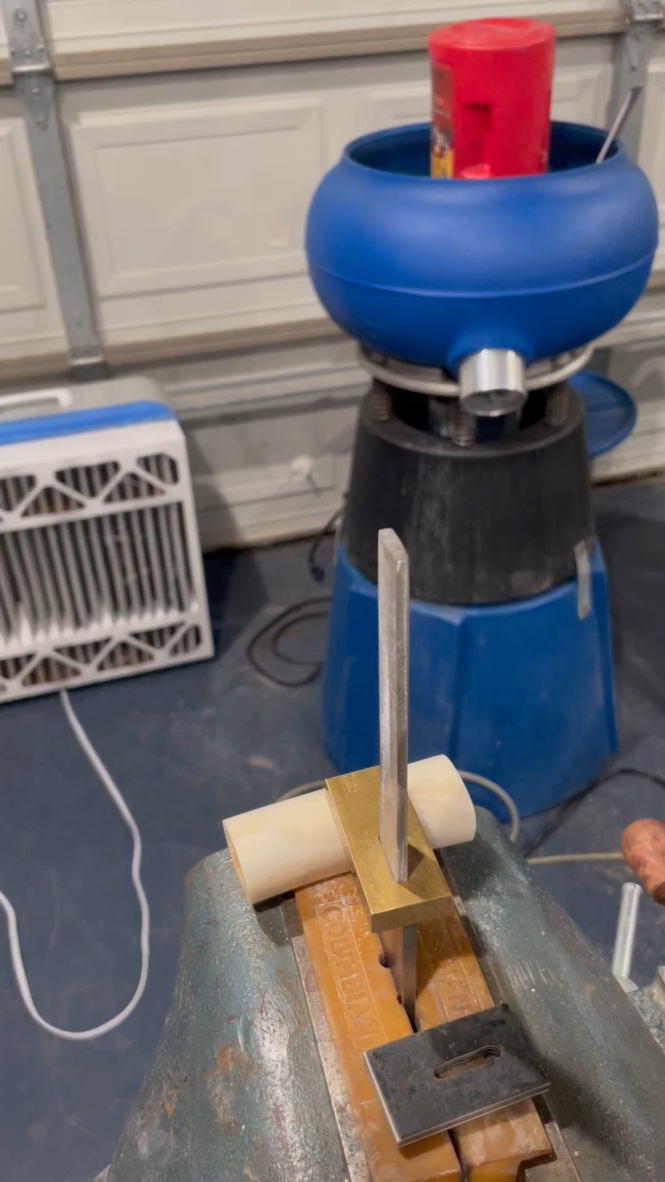
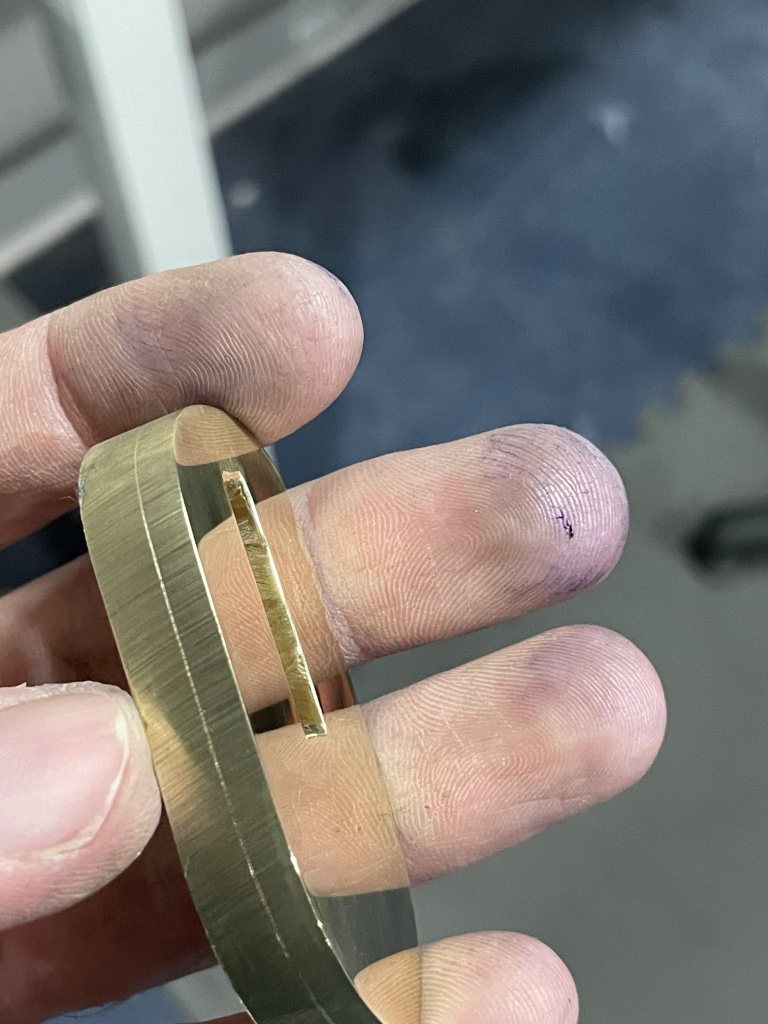
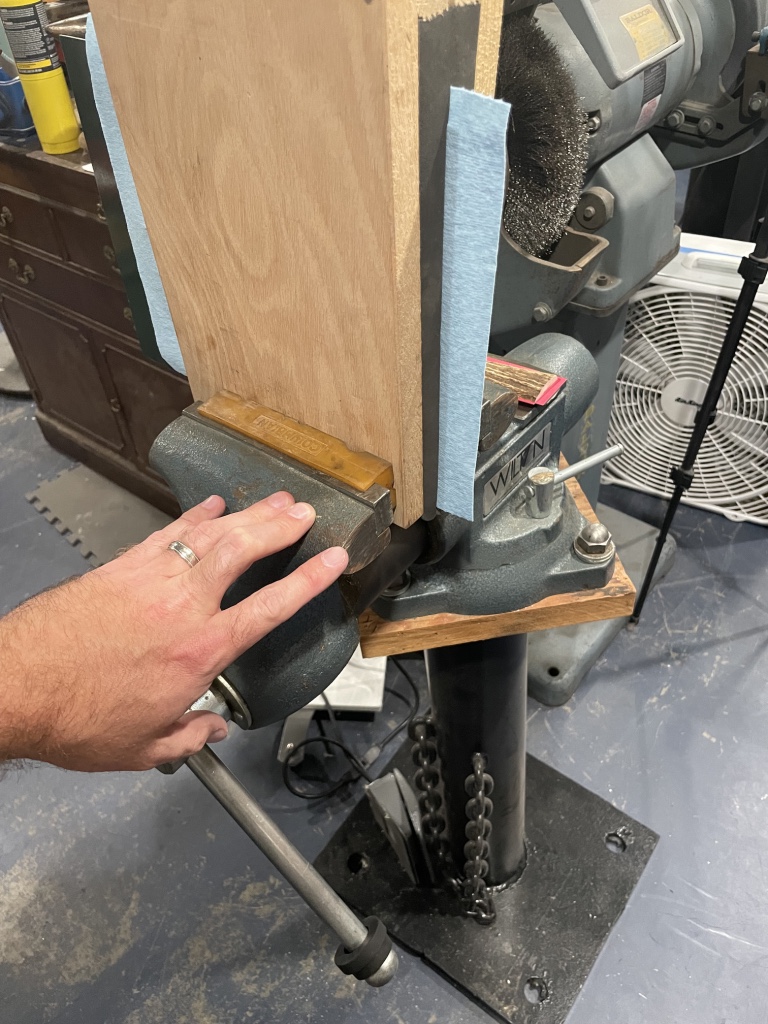
Bone Alignment
Here I am filing down the front of the bone to sit flush with the guard and keep the tang centered in the femur.
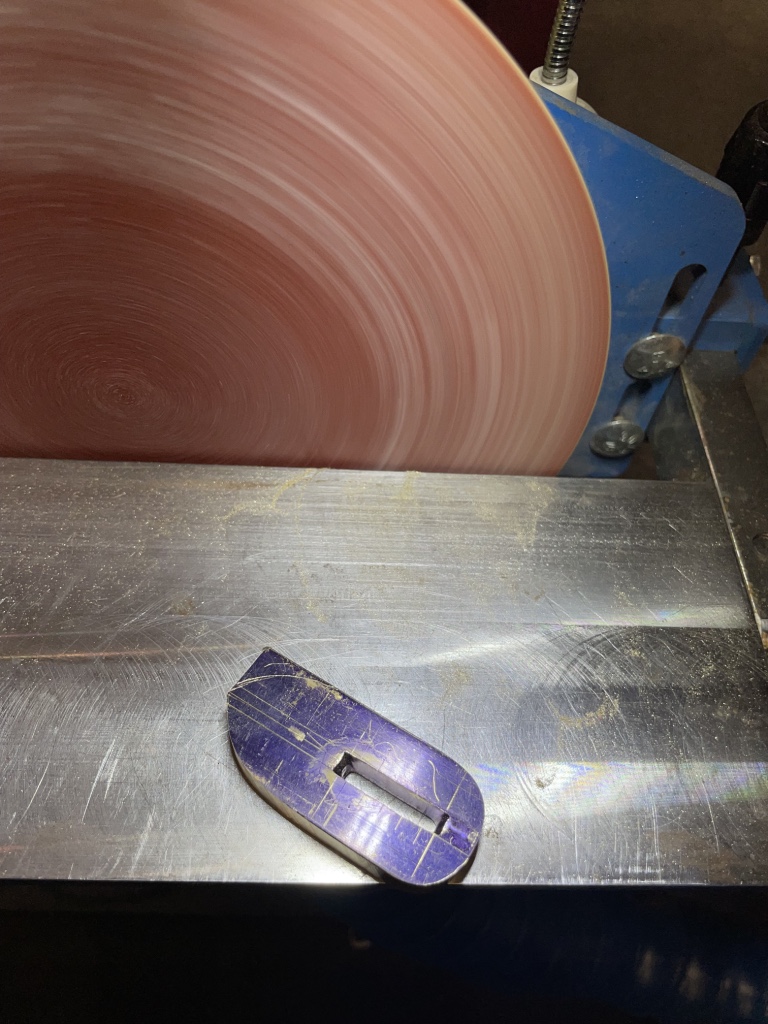
Shaping the Guard
Here I shape the fitted guard using a disk sander to keep the edges at 90°

Flattening the guard
I use a custom made guard holder tool to hold the guard while I flatten it on a custom shop-made disk sander.

Guard Preperation
Hand Sanding the guard front to 1000-grit before buffing to a mirror finish.
Buffing the Guard Fronts
I buff the guard fronts before soldering it into place in order to reduce clean up afterwords when it is harder to access.
Scribing the Guard
I scribe the guard for the top of the contours using a carbide height gauge on a granite surface plate.
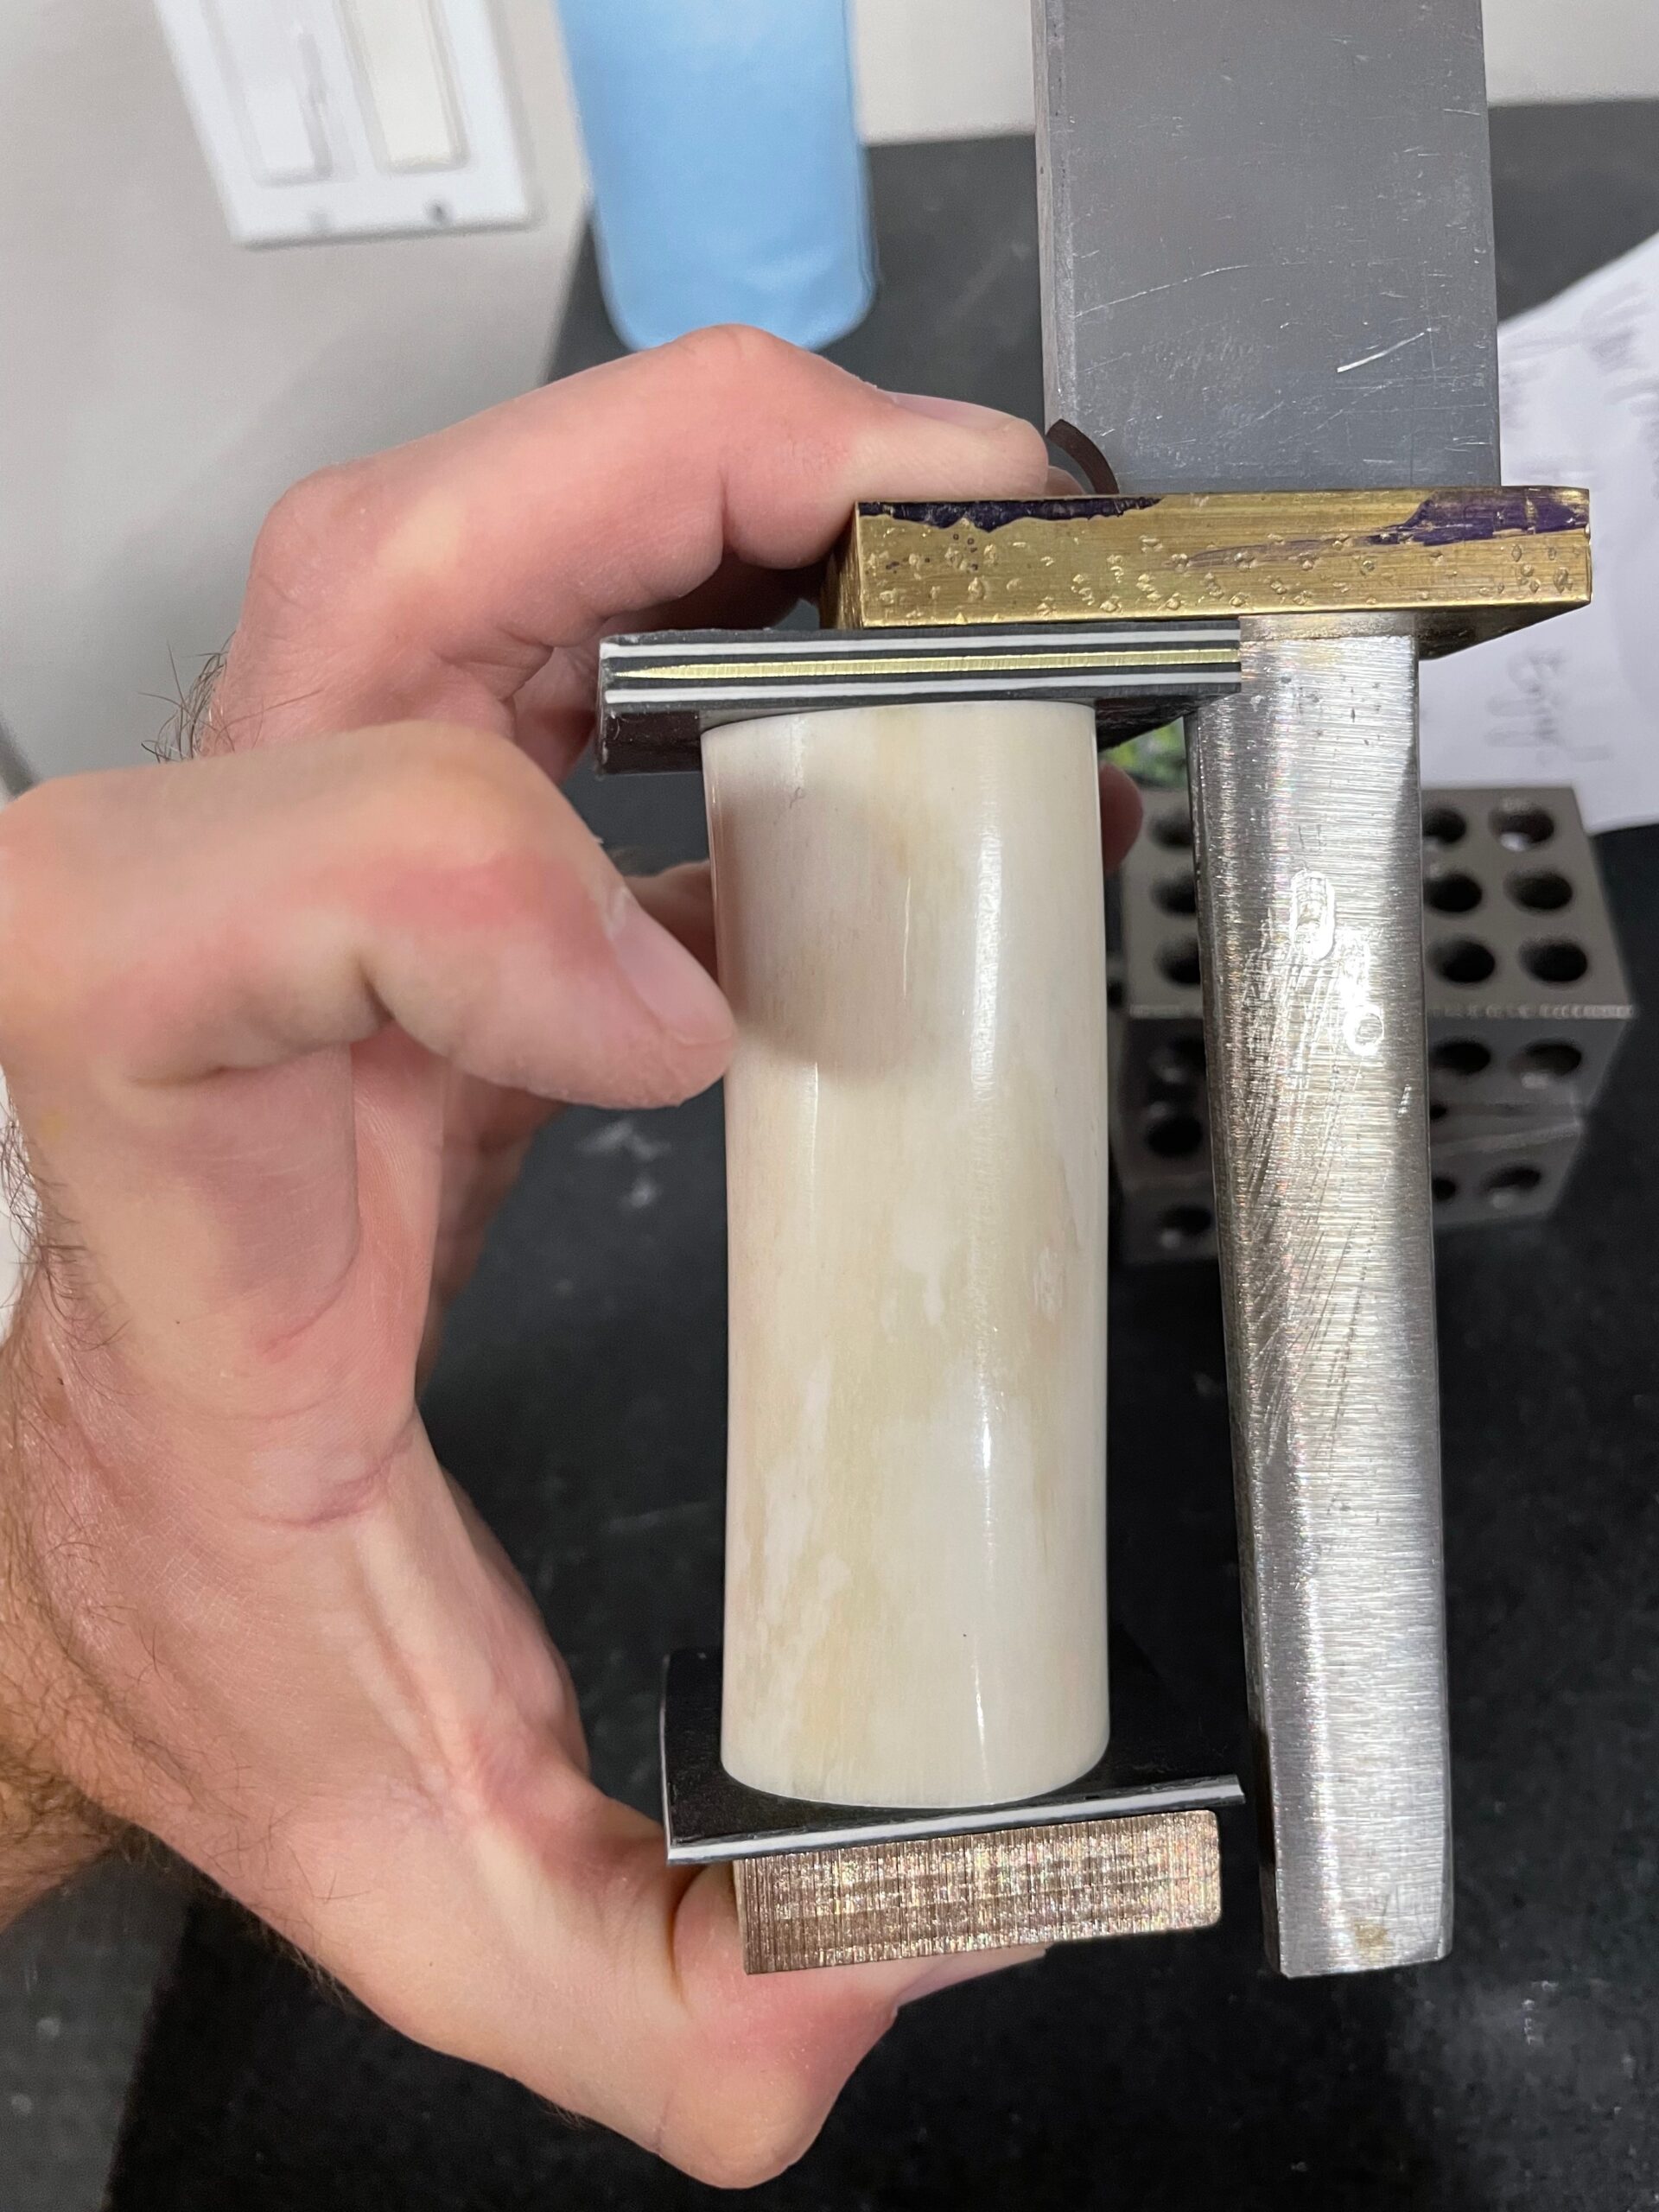
Checking Bone Alignment
Checking for the proper alignment of the bone to the blade.
Checking Bone Alignment
Checking for the proper alignment of the bone to the blade.
Laminating Spacers
Laminating the spacers into a single block for the top and bottom of the knife makes it easier to assemble the blade during glue up. These are compressed in a vise with G-Flex epoxy between 123 blocks to ensure flatness and parallelism.

Measuring for the Back of the Handle
I use a carbide height gauge on a granite surface plate to scribe a line for proper handle length that is parallel to the handle fronts while maintaining +/-0.001″ accuracy.
Planning Spacers and Pommel
This gives me a good idea of what the finished handle will look like when all stacked together. It is going to be pretty.
Measuring for Tang Length
With all of the handle components made, I measure for how much tang to cut off so that it fits within the bone but still offers maximal strength.

Checking for Straightness
Following the second temper cycle, I am checking for straightness and everything looks aligned perfectly.
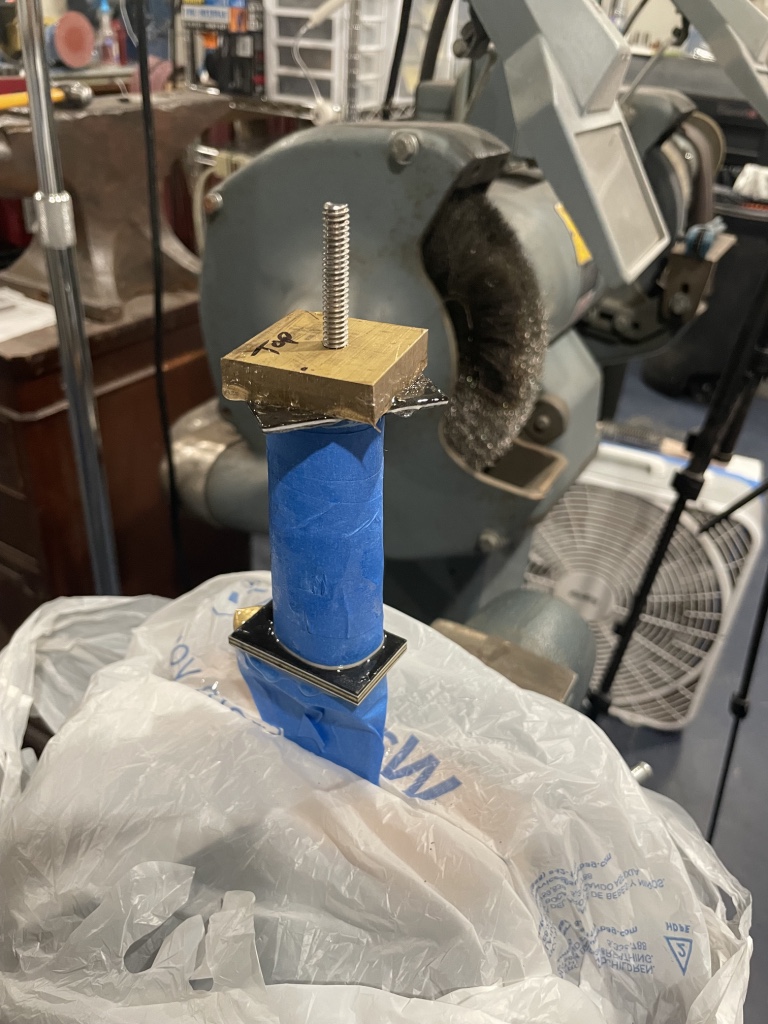
Cutting the Guard
I cut the guard down in length to sit 0.018″ short of the pommel plate and cut a 1″ slot to weld in a stainless steel threaded rod.
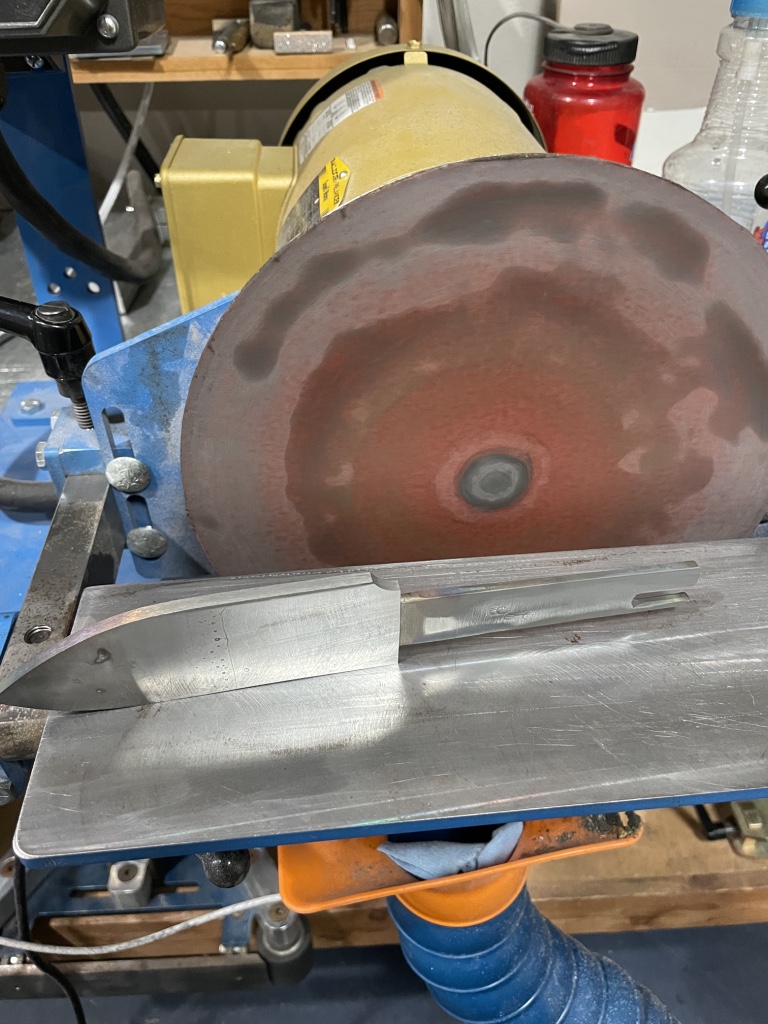
Polishing the Ricasso
This stage of polishing is done on the disk grinder to keep everything flat and parallel.
Polishing the Ricasso
The ricasso area needs fully mirrored before grinding bevels.
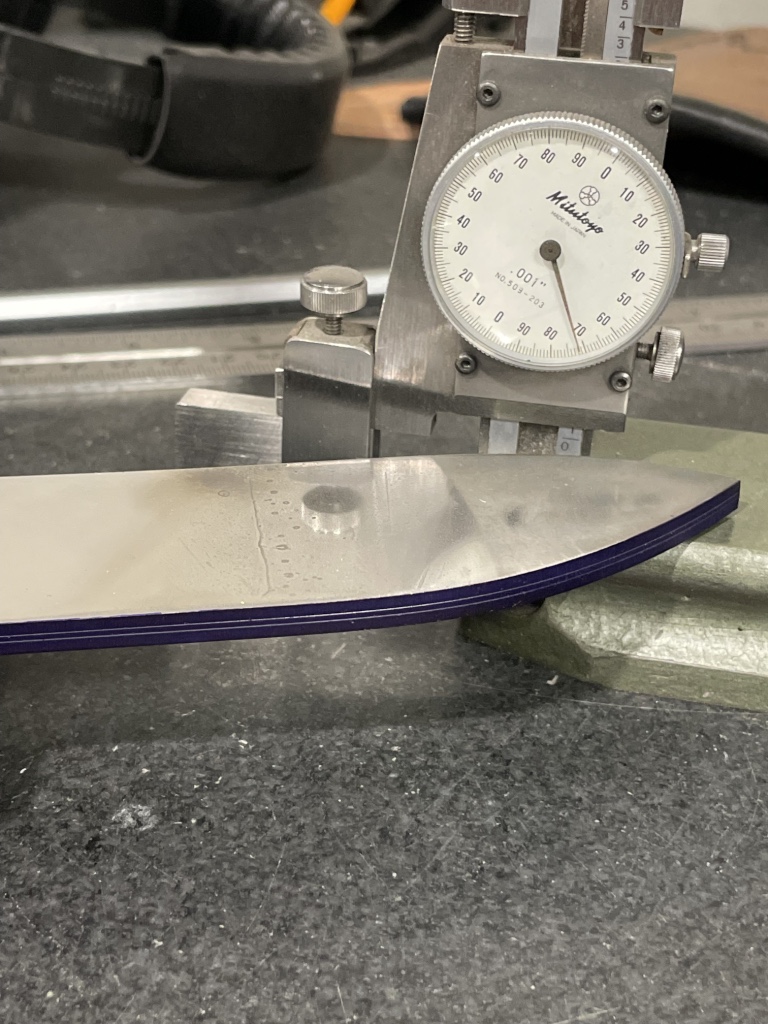
Scribing Center Lines
These are scribed with a carbide height gauge on a granite surface plate to mark where my grinds stop for behind the edge thickness.

Grinding the bevels
It is starting to look like a knife blank now!
Polishing the Bevels
There is a a few hours of labor into this finish alone at this point.
Soldering the Guard
I use a custom made guard jack to hold the guard into place while I solder it. The solder isn’t really needed for strength but provides the best way to seal it from moisture possible and also adds to the strength of the build.

Soldering the Guard
Plenty of clean up to do here, but it will be a strong and waterproof soldered joint.
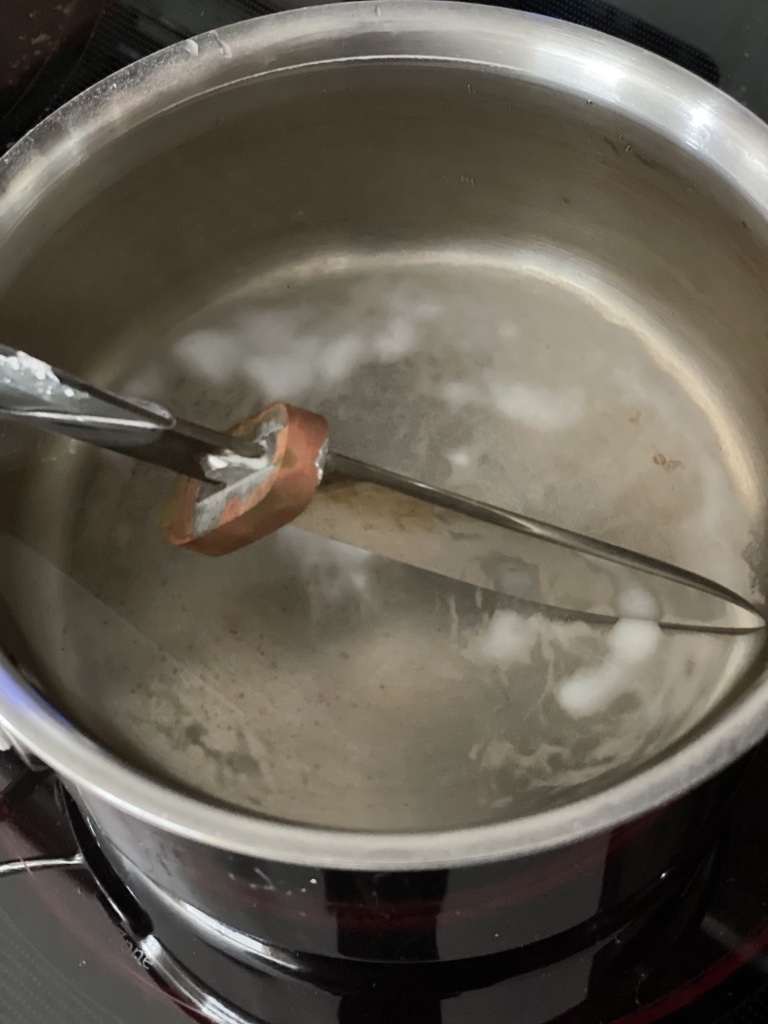
Boiling the Solder
I boil it in baking soda to neutralize the acid flux used when soldering the guard into place.
Welding the Rod for the Pommel
This provides a strong mechanical attachment point for the pommel plate. My welds aren’t pretty but they are strong and work well.
Dry Fit Check
Everything looks tight with no visible light coming through anywhere. It’s time for glue up.
Glue Up
The handle is held together mechanically with compression through the tang/pommel plate and chemically with G-Flex epoxy filling all voids and joints between materials. G-Flex has a modulus of elasticity of 150,000 PSI break strength, is flexible, and dries clear. It is the best epoxy I know of for knifemaking.
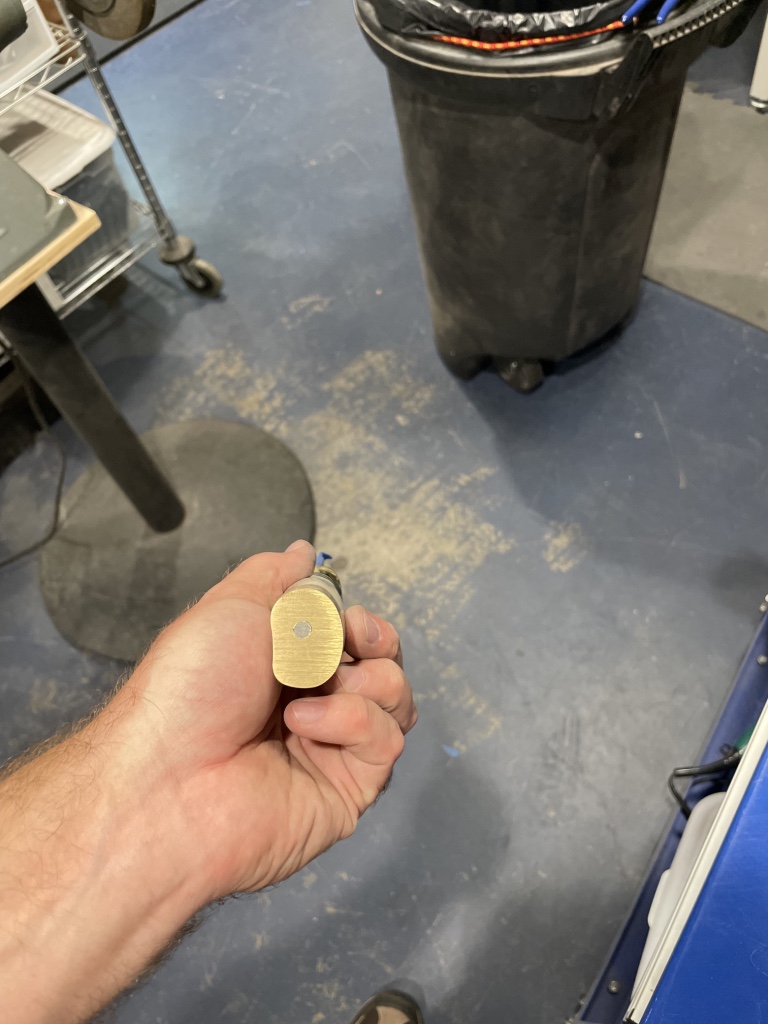
Shaping the pommel.
The Pommel is contoured to match the shape of the bone and the threaded rod is centered in the pommel by design.
Shaping the Pommel
The pommel is contoured to match the natural contours of the bone.

Shaping the Guard
The guard is shaped to compliment the contours of the bone and not cause any hot spots during use.

Planning the Inlays
Here I am selecting the area of the beavertail to use for the inlay work.
Pressing the Beavertail
I pressed the beavertail to get it flat and remove all remaining oils from the tanning process.
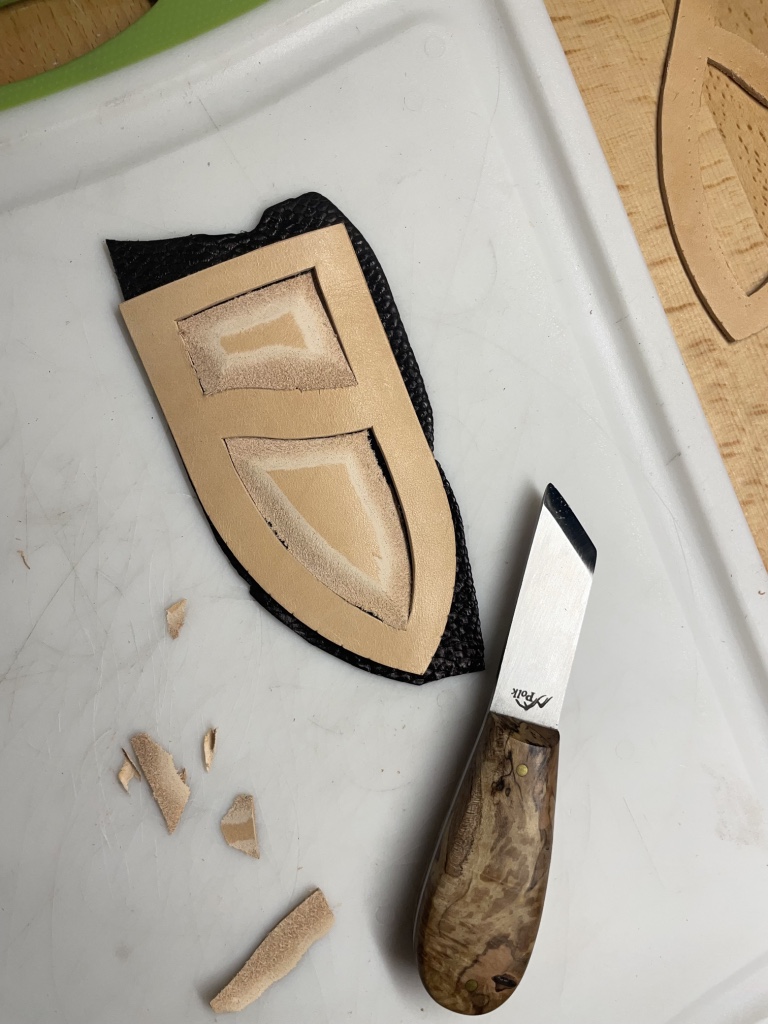
Skiving the the Pads for the Beavertail Inlay
I skive the edges of the pads for the beavertail inlay so it sticks out flush with the overlay. I use a shop made Skiving chisel for this task.

Hand Stitching
Everything was sewn by hand using a saddle stitch with a single thread and a needle on both ends. While this takes longer, it produces the strongest stitch line possible.